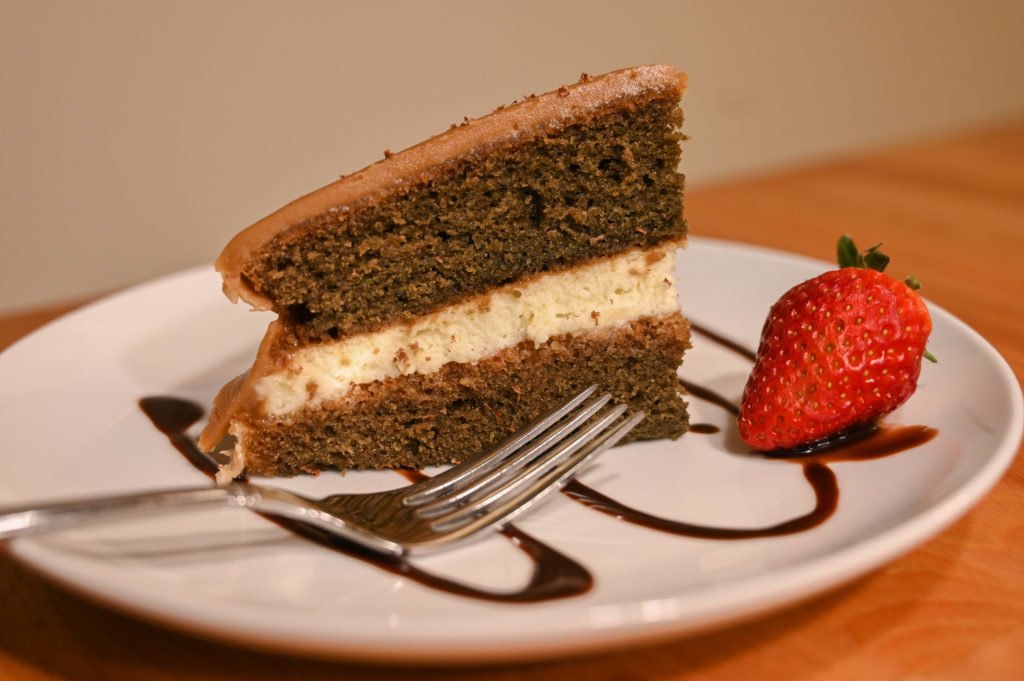
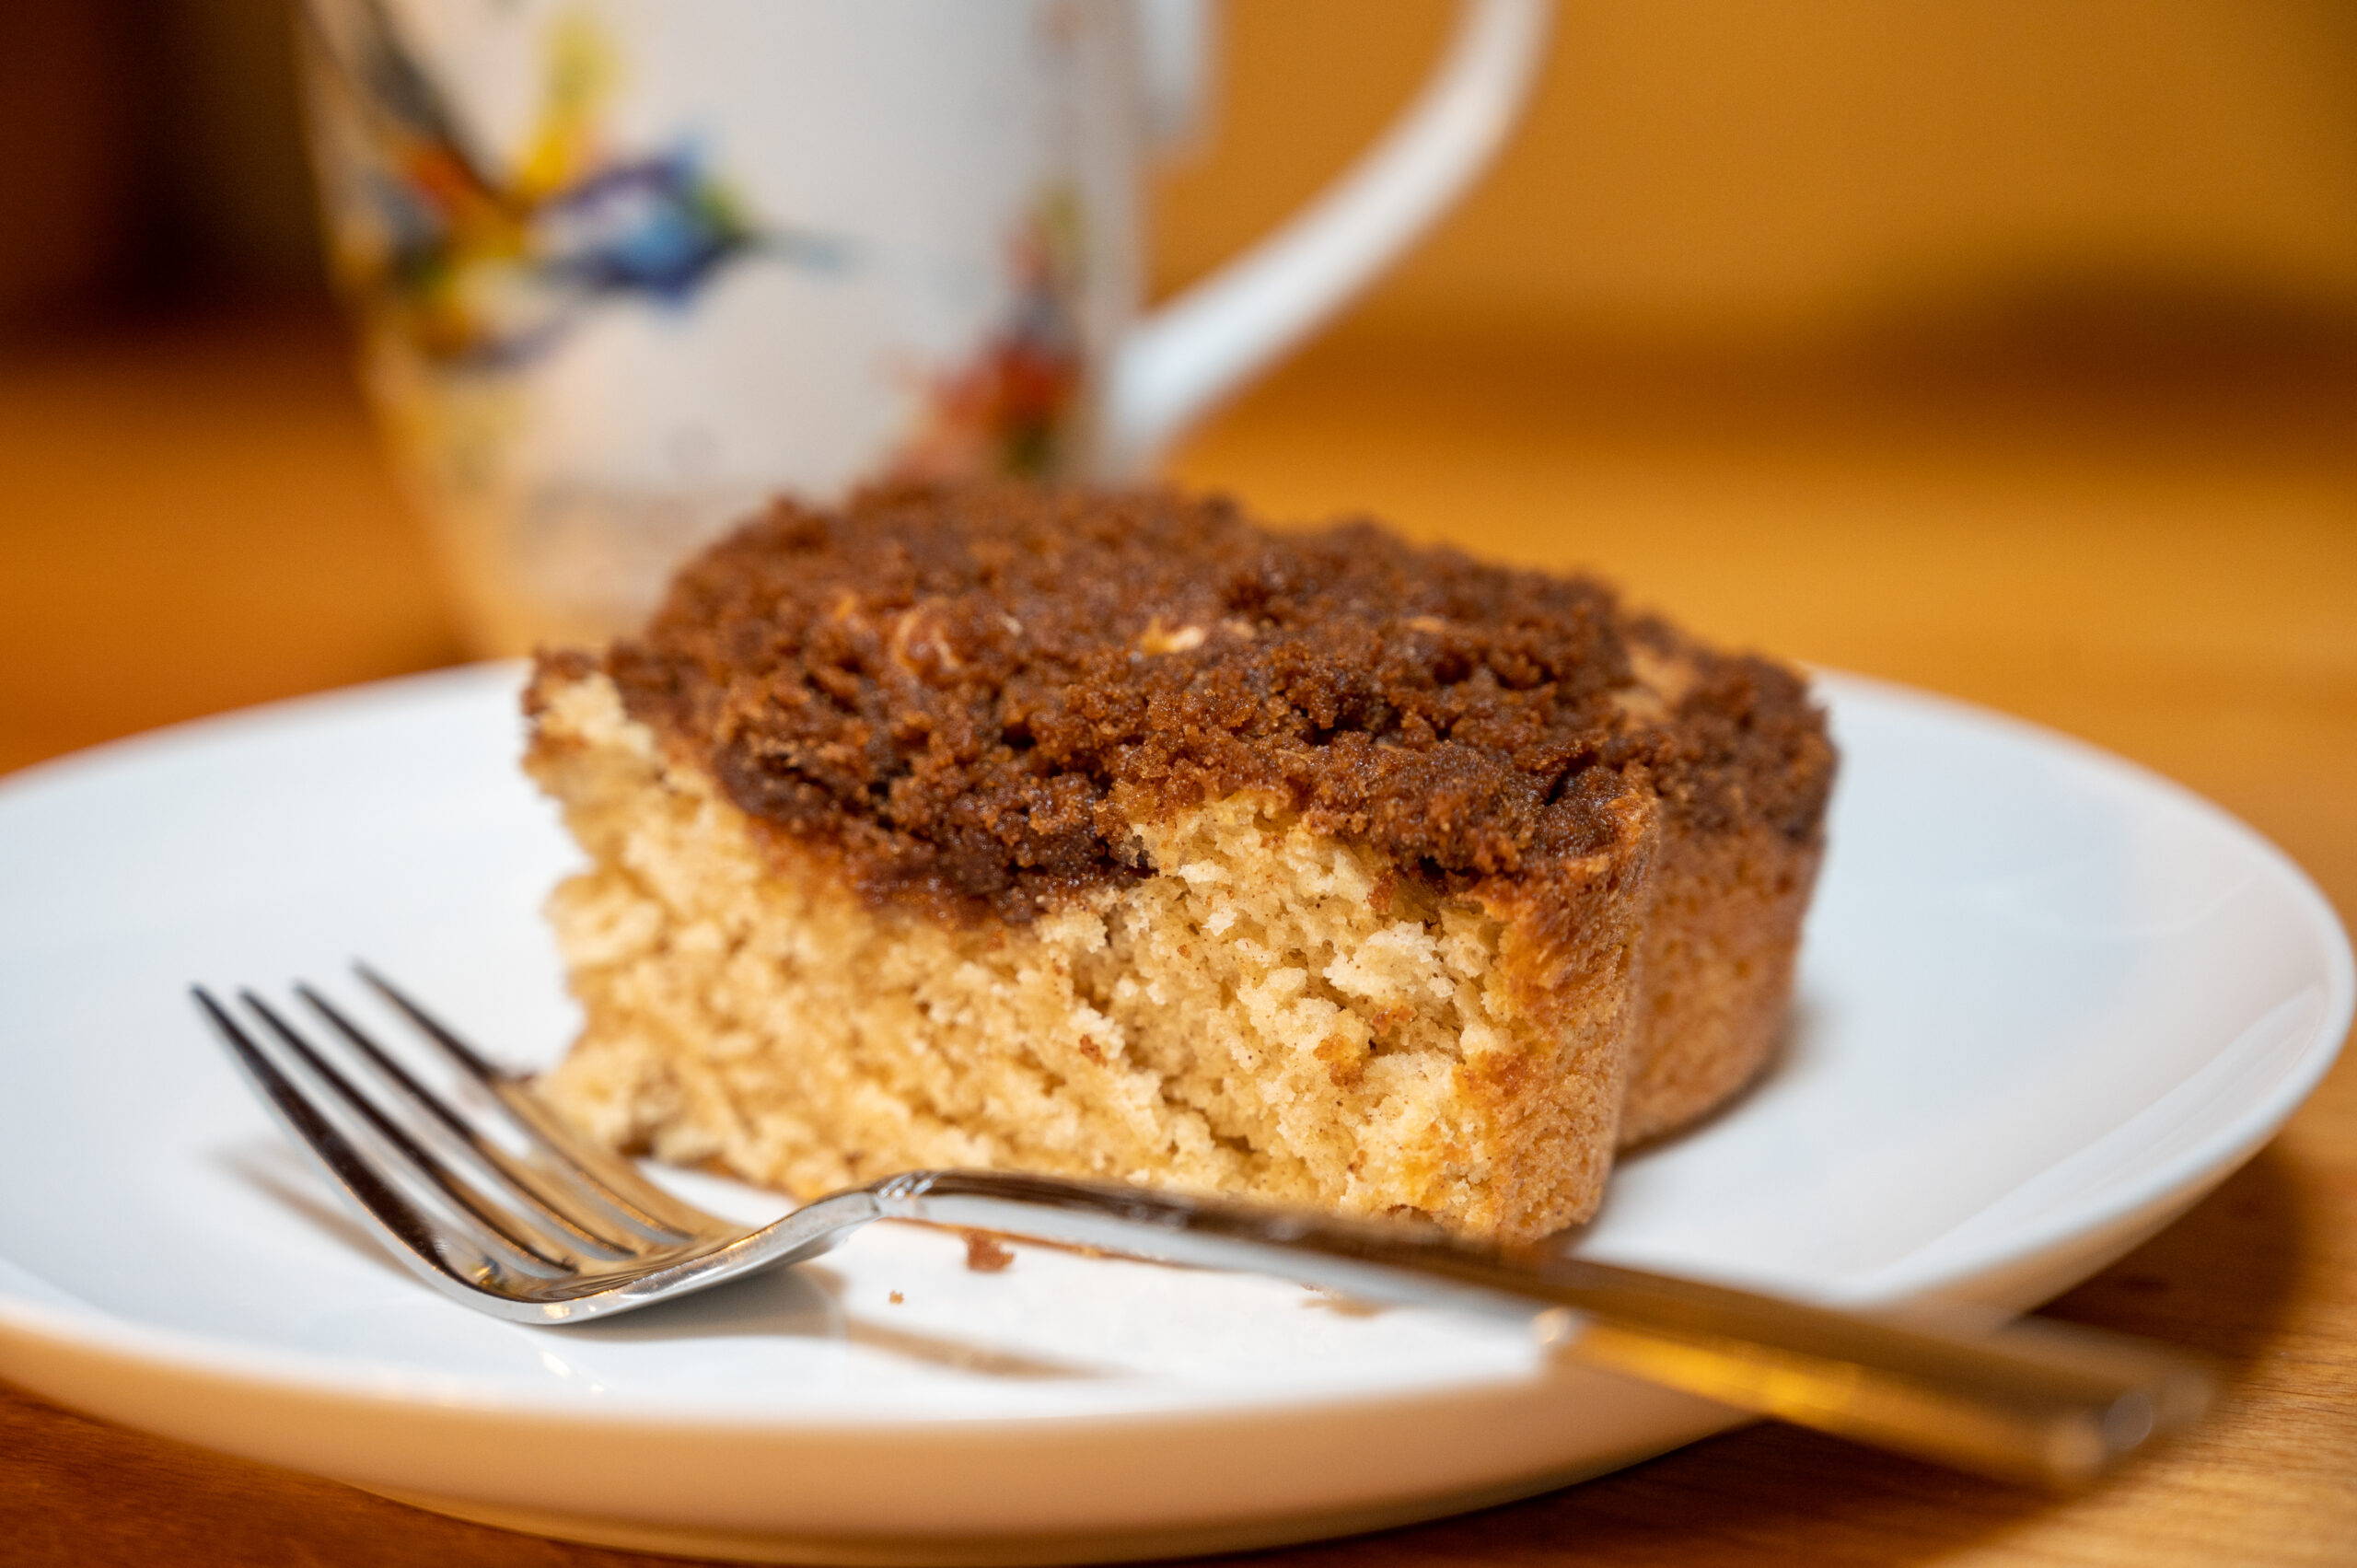
I love coffee! So when I found this coffee cake recipe, I knew I had to make it! You see, I’m not much of a “cake” person. I tend to gravitate toward spicy and salty snacks before desserts. When I do want a dessert, I typically choose a pie or cobbler rather than a sugary cake topped with cavity-inducing frosting. All that changed when I found this coffee cake recipe. Six years ago, I purchased the Pioneer Woman’s “Food From My Frontier” Cookbook, and it changed my life! Okay, that’s a little dramatic, but it certainly gave me a new reason to eat cake on my birthday! I’ve made this every year for my birthday since getting this cookbook, that’s how much I like it. I recommend you consider buying her cookbook as it has a bunch of other great recipes in it! However, in the Pioneer Woman’s cookbook, she makes this as a double layer round cake, and although I’ve made it this way, it’s not always the best choice when feeding a large crowd. So when my husband requested I make this for his team at work, I decided I needed to figure out a way to make this in a 9 x 13 cake pan or a 1/2 sheet. A larger cake not only serves more people but I think a rectangular cake is also easier to transport. This comes in handy when the requests start streaming in for you to bring to all the group functions and holiday gatherings. It’s that good! So be prepared for this to become a new favorite!
Not Your Ordinary Coffee Cake
First off, let me say this isn’t your typical coffee cake recipe. You know the coffee cake you make to eat with your cup of coffee. Don’t get me wrong. I love that kind of coffee cake too. However, this is not that coffee cake. No, this coffee cake recipe is your coffee and your cake in one delicious treat! Think of it like you’re eating your coffee rather than drinking it. It’s a slice of coffee—coffee heaven! This coffee cake is for true coffee lovers. If you don’t like the taste of coffee, then this recipe isn’t for you (and we should probably talk). However, if you’re like me and you like to take slow walks down the coffee aisle at the grocery store just to smell the coffee beans, then this recipe is for you. And if you want to try another coffee recipe of mine, check out these three ways to make Vietnamese coffee. Soon, you will remember your life as “before this coffee cake” and “after eating this coffee cake.” It’s life-changing! Perhaps it’s the caffeine talking, but I’m pretty sure you’re going to think so too once you try it. Jump Ahead to Printable Recipe
My Tips & Modifications for Making this Coffee Cake
When determining how to make this coffee cake recipe for a crowd, I needed to figure out a way to still have a double cake layer, but without it being too thick. You’re going to want a crowd to help you eat it too. Otherwise, you may be tempted to eat the whole thing by yourself! A traditional 9 x 13 cake pan wouldn’t work for me as this is a double layer cake with a filling in between the layers. So I didn’t want each of the cake layers to be as thick as a standard 9 x 13 cake. I didn’t have two 1/2 sheet pans either, so I used the next closest thing I had, two 10 x 15 jelly roll pans. Tips: Use parchment paper in your jellyroll pans for easier removal. Otherwise, make sure to use a baking spray that contains flour and spray your jellyroll pans down good before pouring in the batter. I use a large cutting board to place over the cake after it’s cooled for 10 minutes in the pan, then I gently flip it over onto the cutting board. For the other layer, I do the same, but flip it onto my cake tray (I have a lid that fits over the top of this carrier, which I put on when it’s all finished). Final note: I don’t take any credit for the deliciousness of the original recipe. That was all the Pioneer Woman’s doing. I want to make that clear. This is my adapted version for those of you who wish to make this cake to serve more people. It’s great for birthday parties and holiday parties at the office.
Step by Step Recipe
Feel free to jump ahead to the printable recipe below if you don’t wish to see the step-by-step instructions.
Step 1 Preheat the oven and Prep Your Pans:
Preheat your oven to 350 degrees and line two 10 x 15-inch jelly-roll pans with parchment paper. If you don’t have parchment paper make sure to spray your pans generously with a flour baking spray. Set those aside for now.
Step 2 Add a Whole Lot of Butter:
Place four sticks of butter in a medium saucepan and put the burner on medium-low to melt the butter slowly. You don’t want it to boil and splatter butter everywhere. 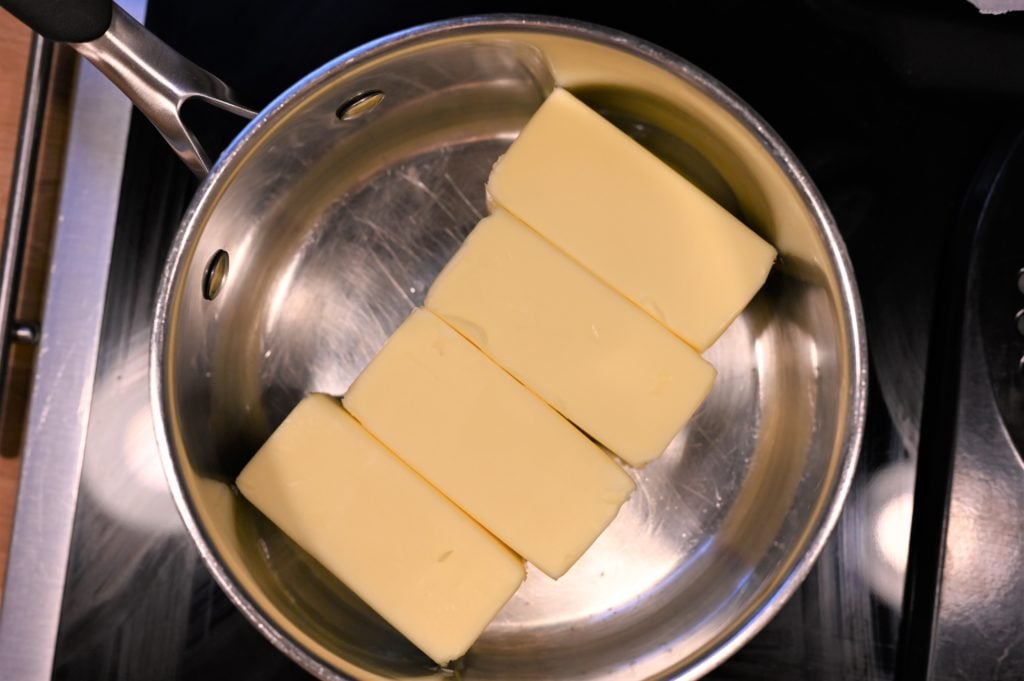
Step 3 Melt Butter & Prep Dry Ingredients:
While the butter is melting, begin measuring the flour, sugar, and salt into a large mixing bowl. (I use a 4.5-quart bowl) Whisk the flour, sugar, and salt together and set aside. Boil 2 cups of water. I like to boil the water in my tea kettle. I love using my tea kettle for boiling water. It’s so convenient!
Step 4 Add the Coffee & Breathe in the Aroma:
Now, add in the coffee crystals to the melted butter mixture and the 2 cups boiling water. And stir it until the coffee crystals melt and combine with the butter and water. Then let it begin to bubble just a little, about 5 seconds before you turn the burner off. 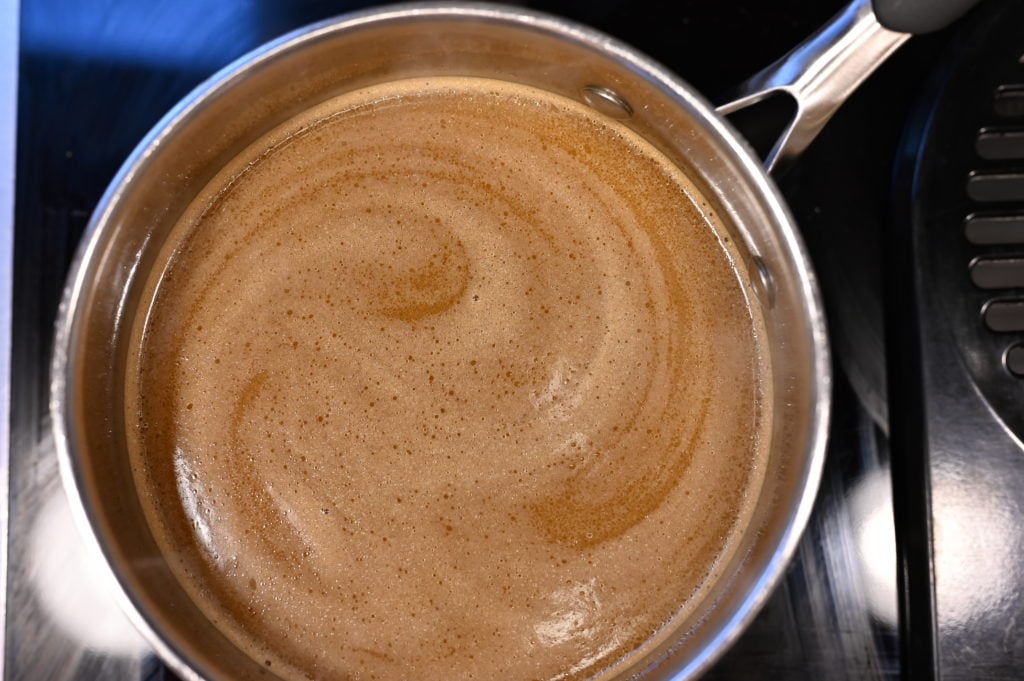
Step 5 Prepare Buttermilk Mixture:
While the coffee sits on the burner with the heat off, prep the buttermilk mixture, whisking it all together, and then set aside. I use a 4-cup Pyrex measuring cup for this step.
Step 6 Mix Your Batter:
Next, take your hot coffee mixture and pour it into the flour mixture. It’s essential to take your time and stir this together really well. When it’s all mixed, it reminds me of ginger snap cookie batter. 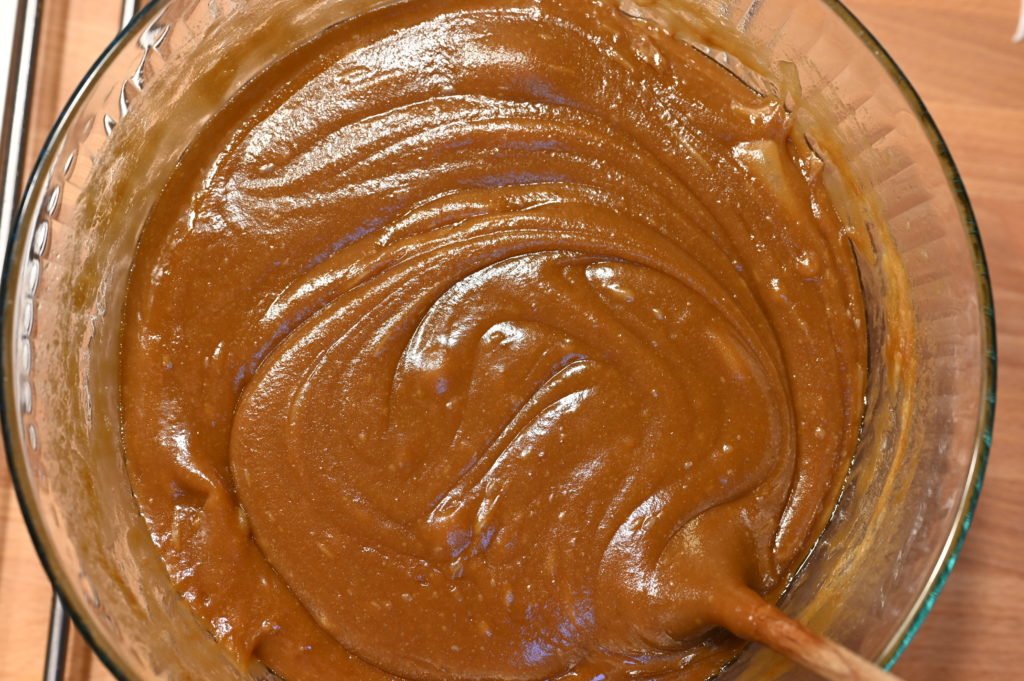
Step 7 Finish Mixing the Batter Completely:
Now add in the buttermilk mixture and slowly mix it into the batter. This may take a few minutes to get it fully incorporated.
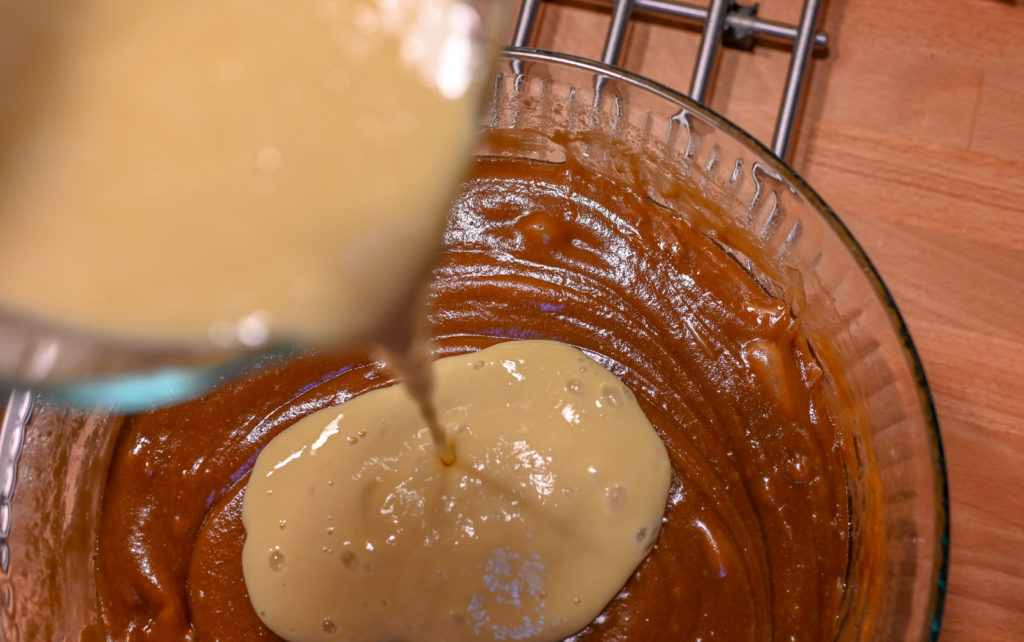
Step 8 Pour Into Pans & Try Not to Lick the Bowl Clean:
Pour the thoroughly mixed batter into the two prepared jelly roll pans. Try your best to divide the mixture equally, but it doesn’t have to be perfect.
Step 9 Bake your Cake:
Then bake in the 350º Fahrenheit oven for 20 minutes (or until an inserted toothpick comes out clean). 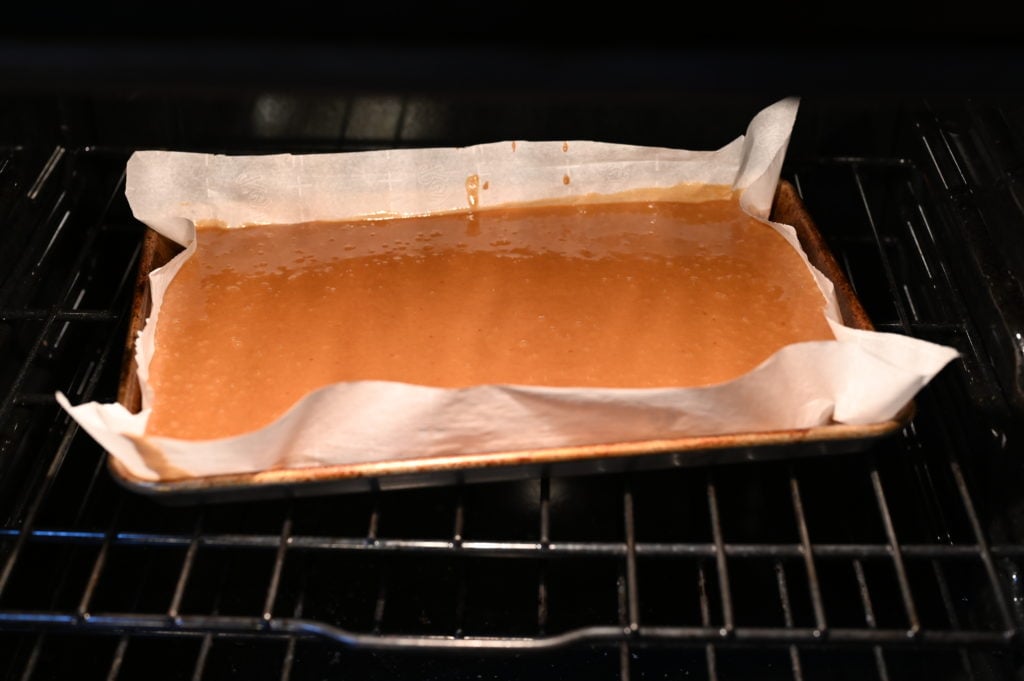
Step 10 Remove Cakes From Pans:
Remove the baked cakes from the oven and let cool in their pans for 10 minutes. Then using a cutting board or if you have a cake platter/tray gently place that on top of your cake and slowly invert the cake pan. Your cake should easily come out of the pan and on to whatever surface you inverted it on top of. 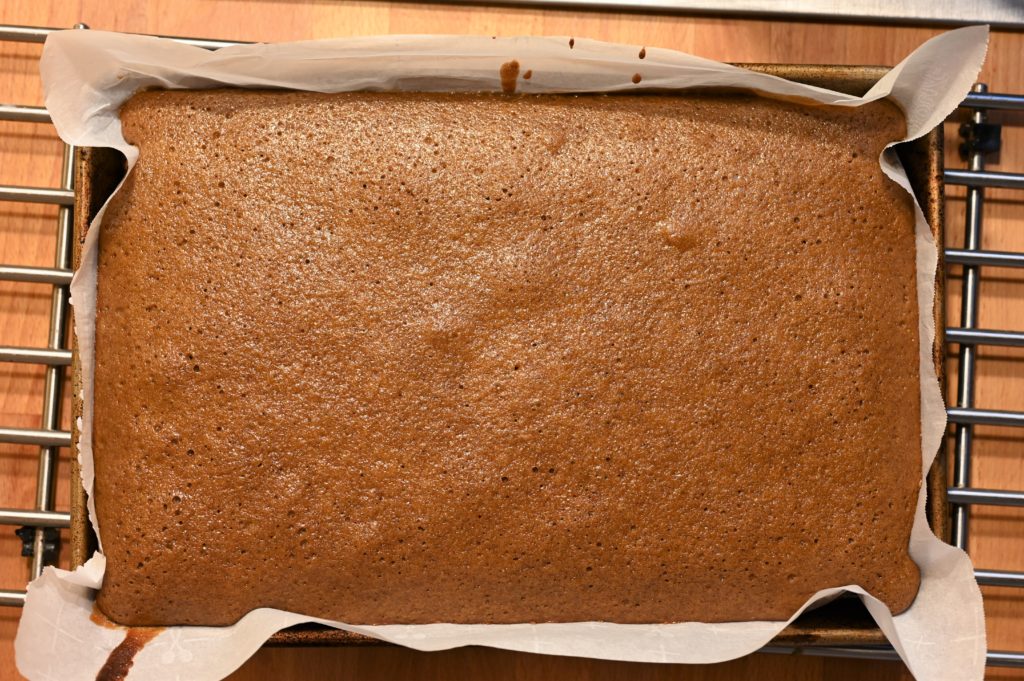
Step 11 Cool the Cakes Completely:
Let the cakes sit there and cool completely. In the meantime, you can whip up your cream filling.
Step 12 Whisk Together the Delicious Cream Filling:
Fit a whisk attachment to a stand mixer and add the cream cheese, 2 cups powdered sugar, and heavy cream to a large mixing bowl. Beat this all together until it is light and fluffy. 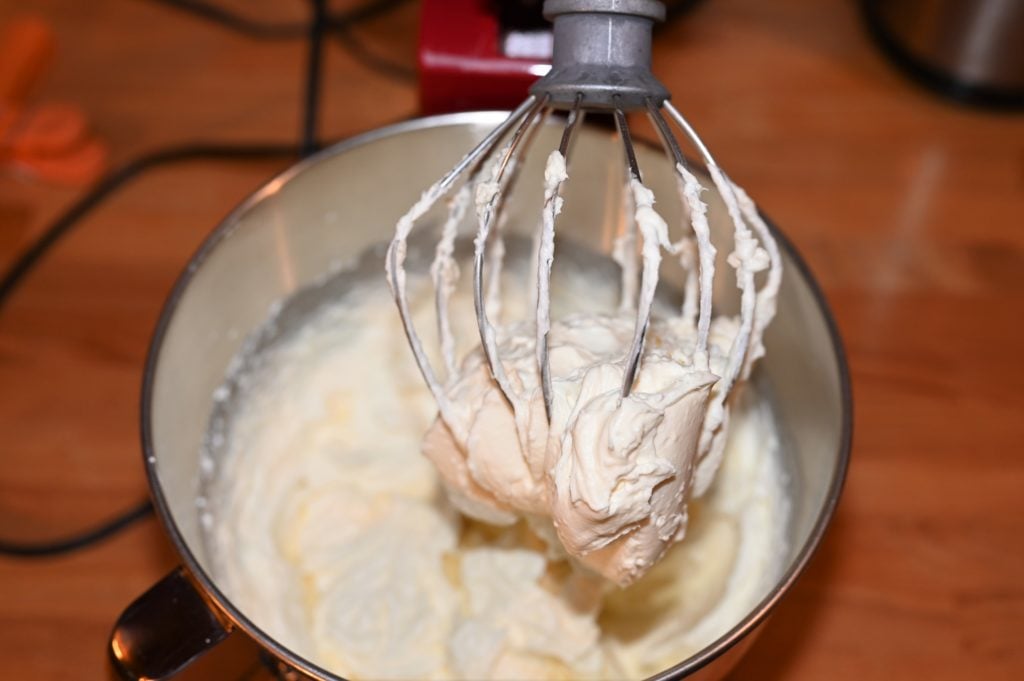
Step 13 Spread the Creamy Filling Over the Bottom Cake Layer:
After your cakes are thoroughly cooled, place your bottom layer on a cake platter (if you haven’t already done this), and spread the creamy filling all over it. I use a big spatula for this part. 
Step 14 Add the Top Layer of Cake:
Then invert your cutting board or whatever surface you’re using over the bottom cake layer and gently lay the top layer of cake on top of the creamy filling. It should now look like some giant delicious cookie sandwich or cake sandwich. 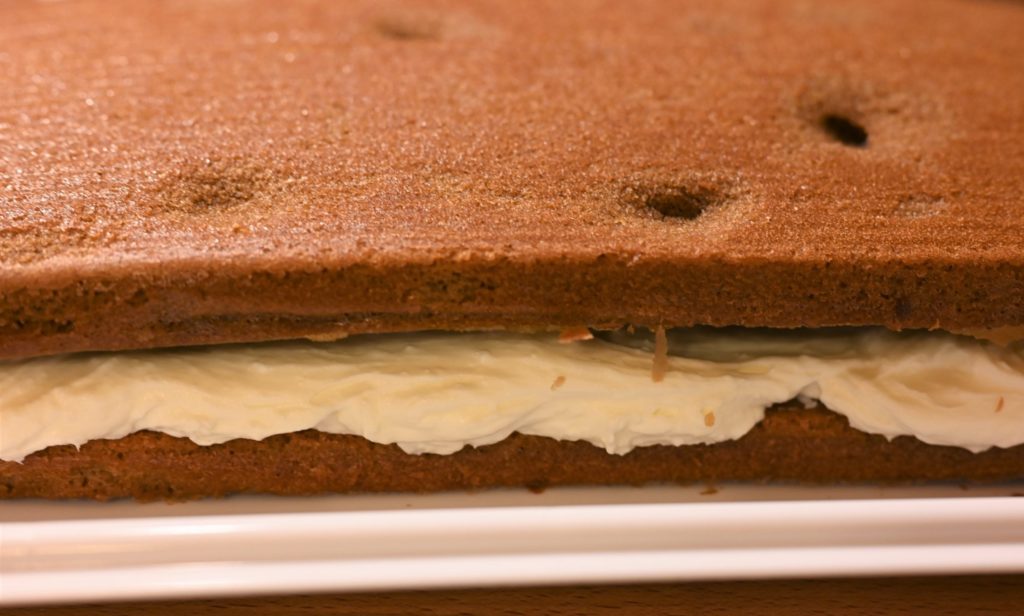
Step 15 Make the Icing:
Melt three sticks of butter in a large saucepan. Then add the 1/4 cup instant coffee crystals. Stir together with a whisk, then add in the half-and-half and whisk together good. Now add the 8 cups powdered sugar and 4 tsp vanilla. Whisk the icing until smooth. 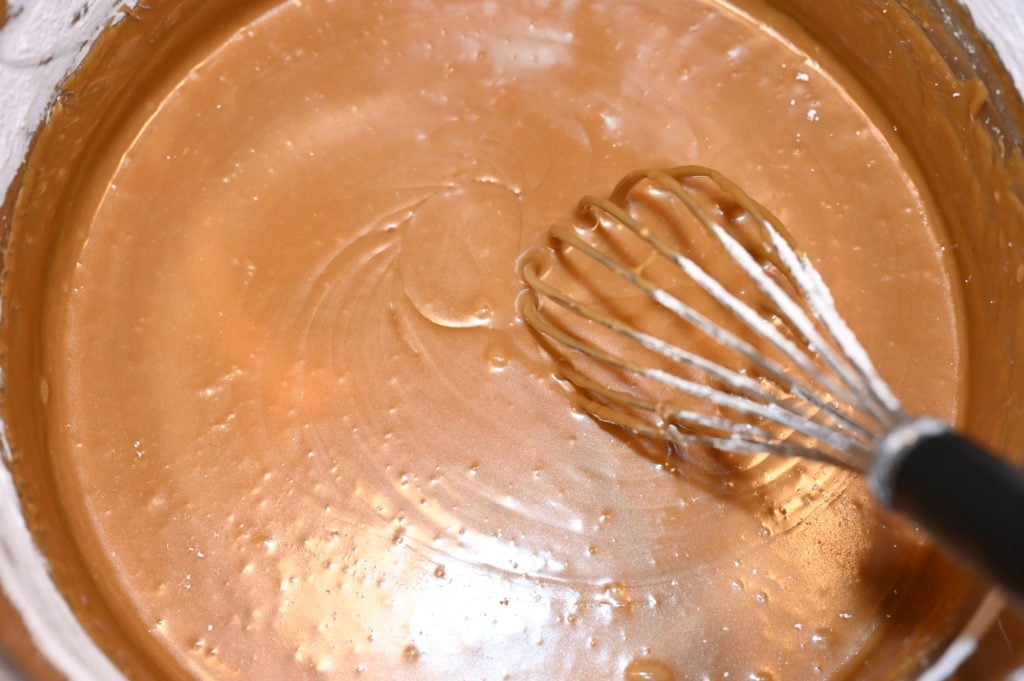
Step 16 Frost Your Cake & Try Not to Eat All the Leftover Icing:
Let it cool for 5 minutes, then gently begin pouring it over your cake, making sure to cover the top of your cake evenly. I let mine drip all down the sides of my cake. If you want, you can always take a knife and try to spread it around the sides of the cake. No matter how it looks, you can be sure it’s going to taste amazing!
Step 17 Eat Cake!:
Considering that as I write this, my birthday is only two days away, I think an early piece of cake is in order! However, I’ll try to wait at least until my hubby gets here. In the meantime, I’ll grab some graham crackers, spread them with a little leftover cream filling, then drizzle with some icing and top with another graham cracker. I just made the best graham cracker sandwich ever! Try it with your leftovers. Warning: This coffee icing is addicting. You may want to hide it from yourself, so you don’t devour it all in one sitting. 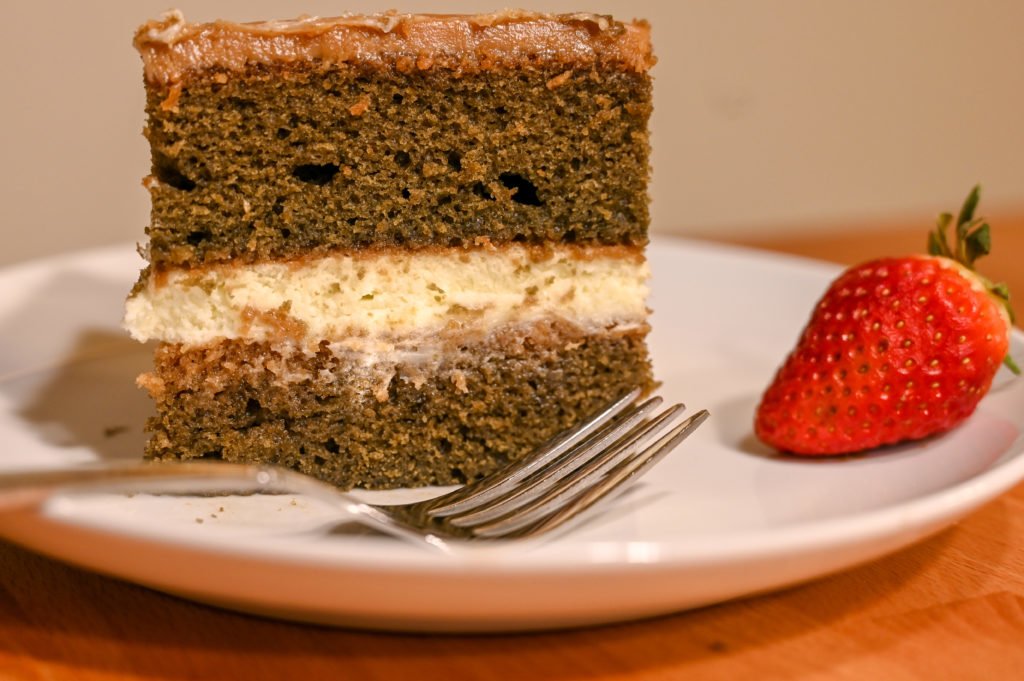
Best Ever Coffee Cake
This delicious coffee cake is made with actual coffee!
Cake Batter
- 2 cups butter ((4 sticks))
- 6 tbsp instant coffee crystals ((3/8 cup))
- 2 cups boiling water
- 4 cups all-purpose flour
- 4 cups granulated sugar
- ½ tsp salt
- 1 cup buttermilk
- 4 eggs
- 2 tsp baking soda
- 4 tsp vanilla extract
Cake Filling
- 2 8-oz packages cream cheese softened at room temp
- 2 cups powdered sugar
- 2 cups heavy cream
Coffee Cake Icing
- 1 ½ cups butter ((3 sticks))
- ¼ cup instant coffee crystals
- ½ cup half-and-half
- 8 cups powdered sugar
- 4 tsp vanilla extract
Cake Batter Instructions
-
Preheat oven to 350° Fahrenheit.
-
Spray two jelly roll pans (10 x 15 inch) with a flour baking spray or line with parchment paper.
-
Melt the 4 sticks of butter in a medium saucepan.
-
Add the 6 Tbsp of instant coffee and then add the 2 cups boiling water.
-
Let this mixture bubble for about 5 seconds, then turn off the heat.
-
In a separate large bowl, whisk together the flour, sugar, and salt. Then pour the hot mixture over the dry ingredients and stir to combine.
-
In another medium bowl, mix together the buttermilk, eggs, baking soda, and vanilla extract. Pour this mixture into the ingredients in the large bowl and stir together. Mix until fully incorporated.
-
Pour this batter into the two jelly roll pans, dividing the batter equally between them both. Bake for about 20 minutes.
-
Take the pans out of the oven and let the cakes cool in the pans for about 10 minutes. Then turn the pans over on to a clean, prepared surface, and remove from the jelly roll pans. Gently peel off the parchment paper (if used) and allow the cakes to cool completely.
-
While the cake is cooling, begin preparing the filling.
Cake Filling Instructions
-
Fit a stand mixer with the wire whip attachment. (A hand mixer should work too)
-
Add the softened cream cheese, 2 cups powdered sugar, and heavy cream to a large mixing bowl. Beat until light and fluffy, then set aside while the cake cools completely.
-
When the cake has cooled completely, move it to your cake holder or cake stand. Then spread the creamy filling over the bottom layer.
-
Gently add the second layer of cake on top of the filling.
Coffee Cake Icing Instructions
-
Melt the 3 sticks of butter in a large saucepan and add ¼ cup instant coffee crystals. Stir together.
-
Add the half-and-half to the saucepan and whisk together. Then turn off the heat.
-
Add the 8 cups powdered sugar and vanilla. Whisk together really good to create a smooth icing.
-
Let the icing cool for 5 minutes. Then gently pour the coffee icing over the top of your cake. Make sure you pour it so it covers the entire cake and drips down over the sides.
-
Enjoy this delicious cup of coffee served as a slice of cake. Coffee and cream all in one bite!
*TIP: If some of the cake peels off with the parchment paper, don’t panic, you smooth it back on with a butter knife. However, you’ll cover with filling and icing later so any small patches won’t be noticed.
*When frosting the cake, you can try to smooth the icing along the sides for better coverage. However, I find pouring it and letting it just drip down works best as it is hard to smooth after it begins to cool on the cake. So you have to act fast!
Written by
Charity
Traveler, coffee enthusiast, and storyteller — exploring destinations one sip at a time.
Best Ever Coffee Cake
Prep
25 min
Cook
35 min
Total
150 min
Yields
20 slices
✦ Ingredients
Cake Batter
- 2 cups butter ((4 sticks))
- 6 tbsp instant coffee crystals ((3/8 cup))
- 2 cups boiling water
- 4 cups all-purpose flour
- 4 cups granulated sugar
- ½ tsp salt
- 1 cup buttermilk
- 4 eggs
- 2 tsp baking soda
- 4 tsp vanilla extract
Cake Filling
- 2 8-oz packages cream cheese softened at room temp
- 2 cups powdered sugar
- 2 cups heavy cream
Coffee Cake Icing
- 1 ½ cups butter ((3 sticks))
- ¼ cup instant coffee crystals
- ½ cup half-and-half
- 8 cups powdered sugar
- 4 tsp vanilla extract
⟐ Method
Cake Batter Instructions
- 1
Preheat oven to 350° Fahrenheit.
- 2
Spray two jelly roll pans (10 x 15 inch) with a flour baking spray or line with parchment paper.
- 3
Melt the 4 sticks of butter in a medium saucepan.
- 4
Add the 6 Tbsp of instant coffee and then add the 2 cups boiling water.
- 5
Let this mixture bubble for about 5 seconds, then turn off the heat.
- 6
In a separate large bowl, whisk together the flour, sugar, and salt. Then pour the hot mixture over the dry ingredients and stir to combine.
- 7
In another medium bowl, mix together the buttermilk, eggs, baking soda, and vanilla extract. Pour this mixture into the ingredients in the large bowl and stir together. Mix until fully incorporated.
- 8
Pour this batter into the two jelly roll pans, dividing the batter equally between them both. Bake for about 20 minutes.
- 9
Take the pans out of the oven and let the cakes cool in the pans for about 10 minutes. Then turn the pans over on to a clean, prepared surface, and remove from the jelly roll pans. Gently peel off the parchment paper (if used) and allow the cakes to cool completely.
- 10
While the cake is cooling, begin preparing the filling.
Cake Filling Instructions
- 1
Fit a stand mixer with the wire whip attachment. (A hand mixer should work too)
- 2
Add the softened cream cheese, 2 cups powdered sugar, and heavy cream to a large mixing bowl. Beat until light and fluffy, then set aside while the cake cools completely.
- 3
When the cake has cooled completely, move it to your cake holder or cake stand. Then spread the creamy filling over the bottom layer.
- 4
Gently add the second layer of cake on top of the filling.
Coffee Cake Icing Instructions
- 1
Melt the 3 sticks of butter in a large saucepan and add ¼ cup instant coffee crystals. Stir together.
- 2
Add the half-and-half to the saucepan and whisk together. Then turn off the heat.
- 3
Add the 8 cups powdered sugar and vanilla. Whisk together really good to create a smooth icing.
- 4
Let the icing cool for 5 minutes. Then gently pour the coffee icing over the top of your cake. Make sure you pour it so it covers the entire cake and drips down over the sides.
- 5
Enjoy this delicious cup of coffee served as a slice of cake. Coffee and cream all in one bite!
Notes
*TIP: If some of the cake peels off with the parchment paper, don't panic, you smooth it back on with a butter knife. However, you'll cover with filling and icing later so any small patches won't be noticed. *When frosting the cake, you can try to smooth the icing along the sides for better coverage. However, I find pouring it and letting it just drip down works best as it is hard to smooth after it begins to cool on the cake. So you have to act fast!
Share this story
Keep Reading
Keep Reading

More Adventures
Explore More
10 Best K-Cup Coffees To Start Your Day
Here are 10 of the best K-Cup coffees to try. These are flavorful, aromatic, and the perfect way to start your day when you're short on time.
Read More
7 Best Coffees to Try For Any Brewing Method
These are the best coffees to try no matter what coffee brewing method you use. They are fresh roasted and a perfect way to start your day!
Read More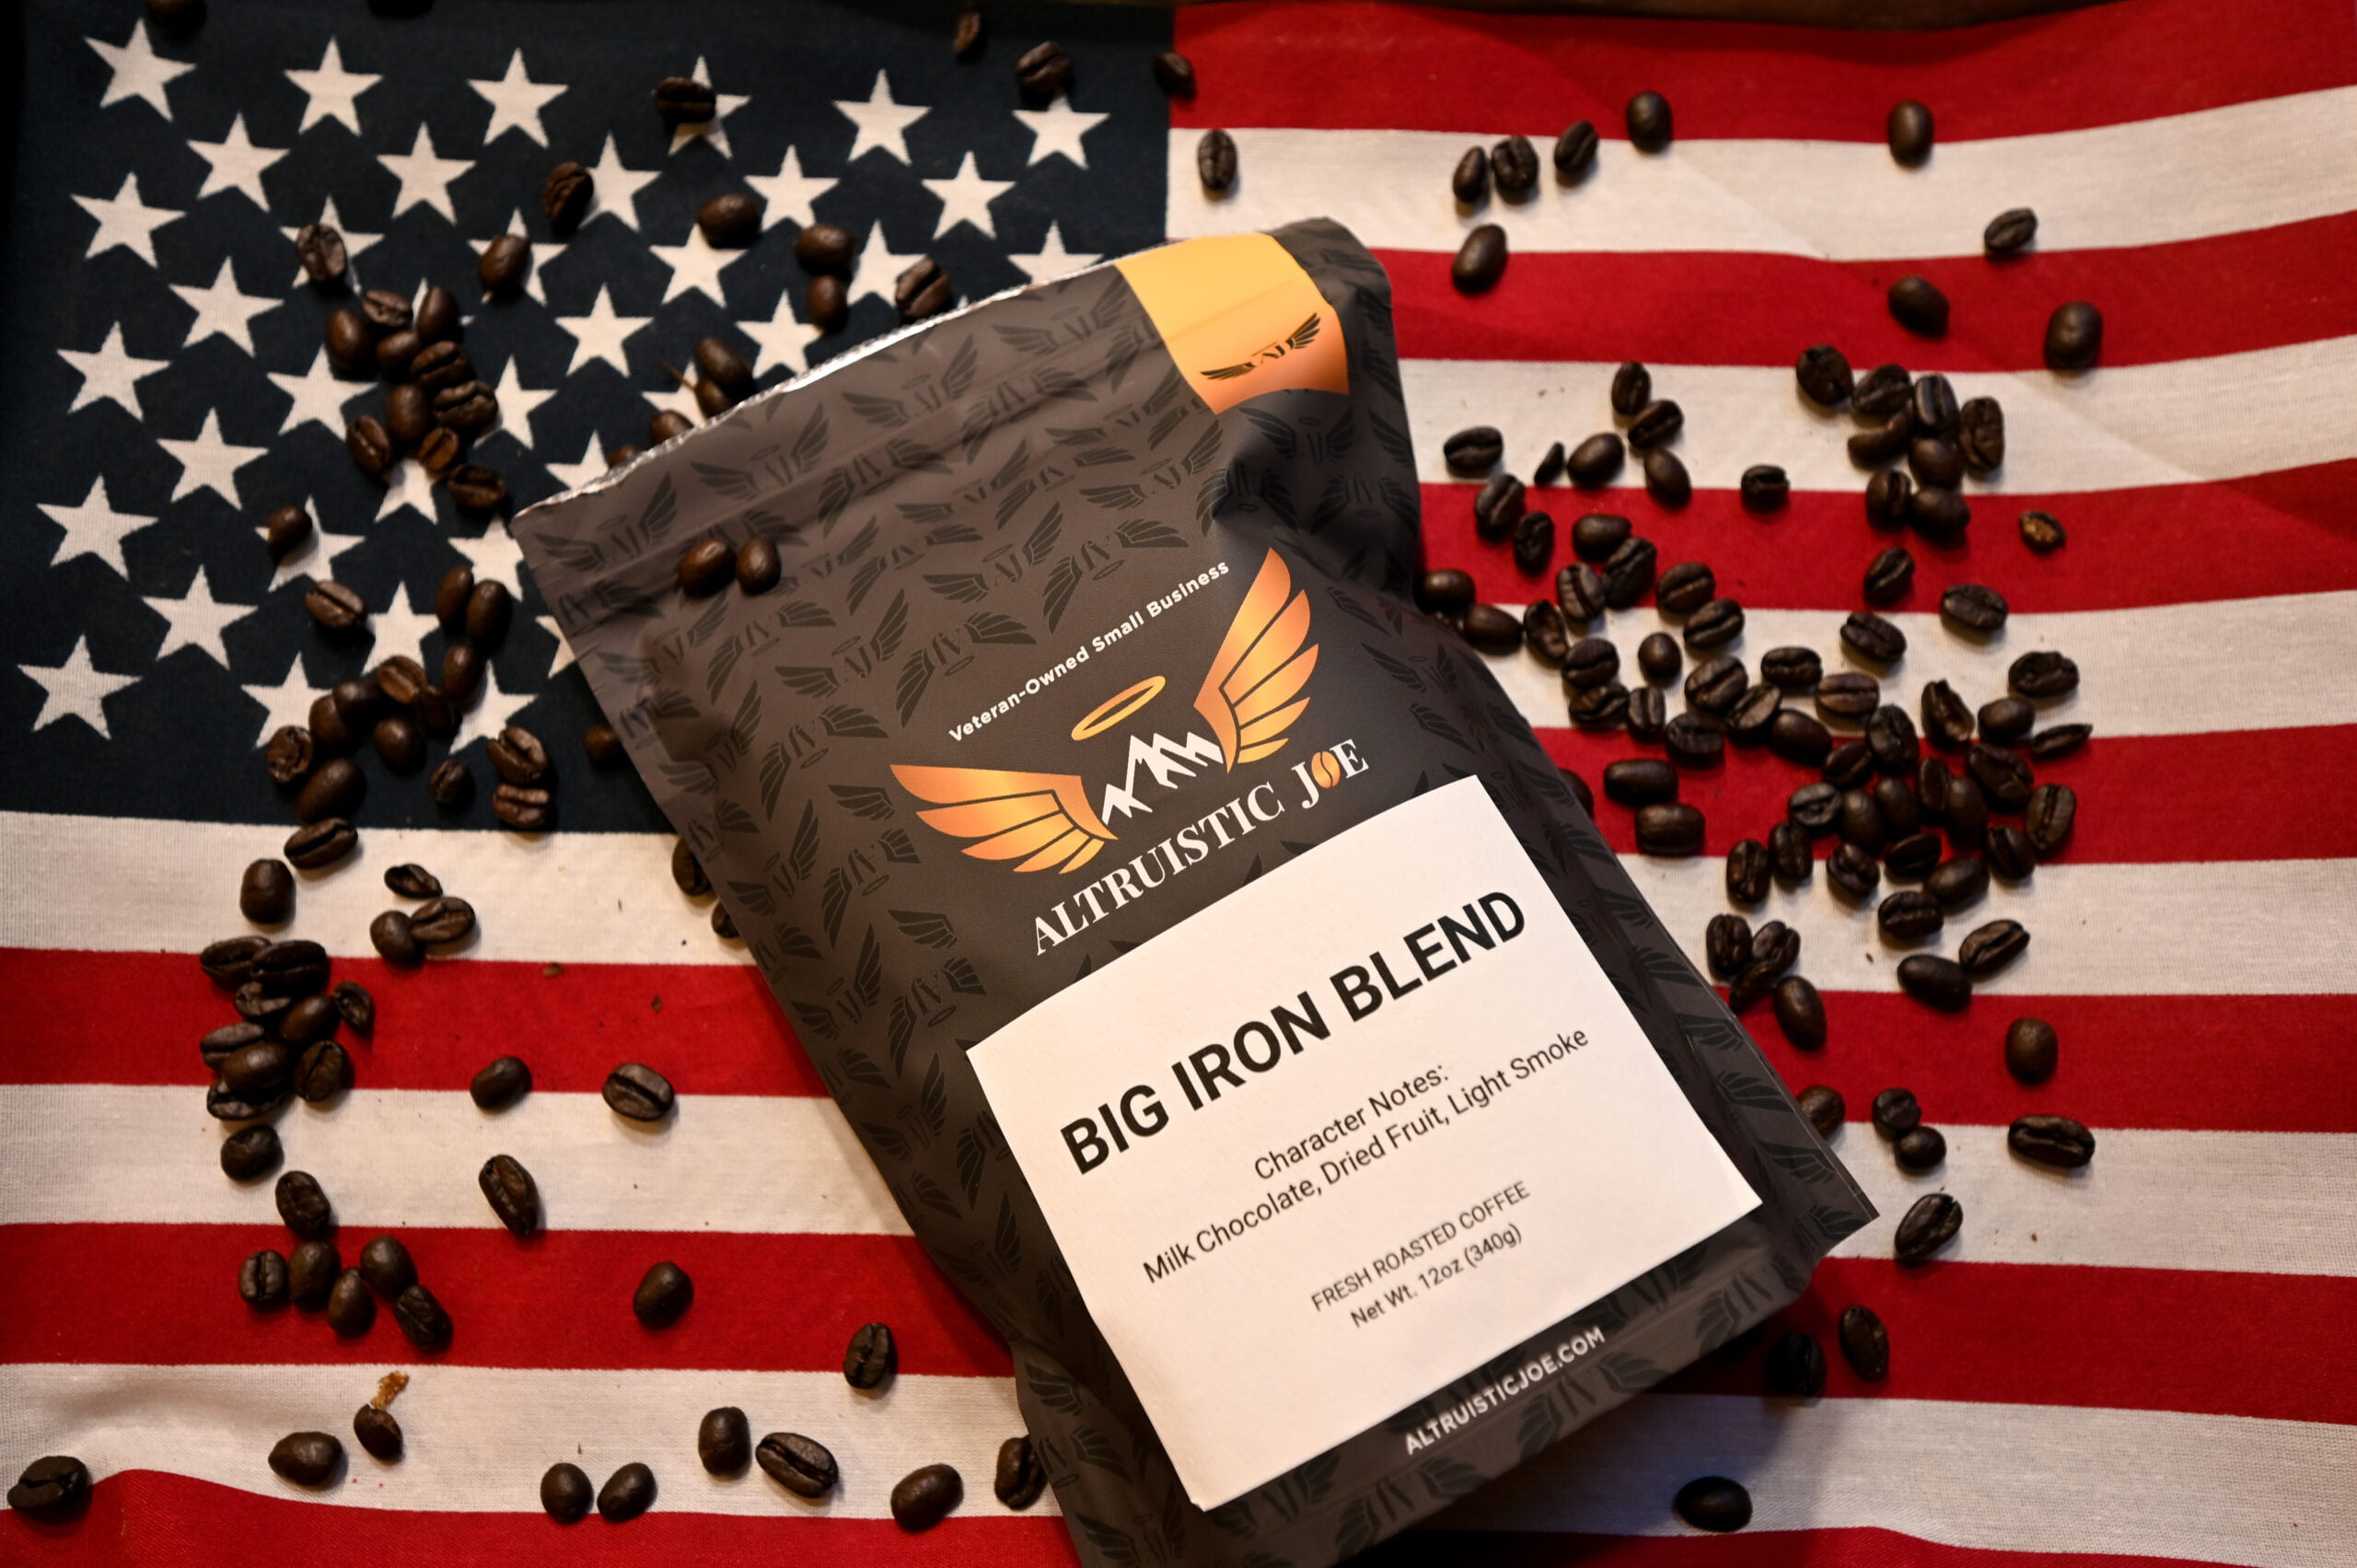
Altruistic Joe: Coffee With a Cause
Veteran-owned Altruistic Joe delivers fantastic coffee with a cause right to your door, delicious aroma and all! Buy it today and give back!
Read More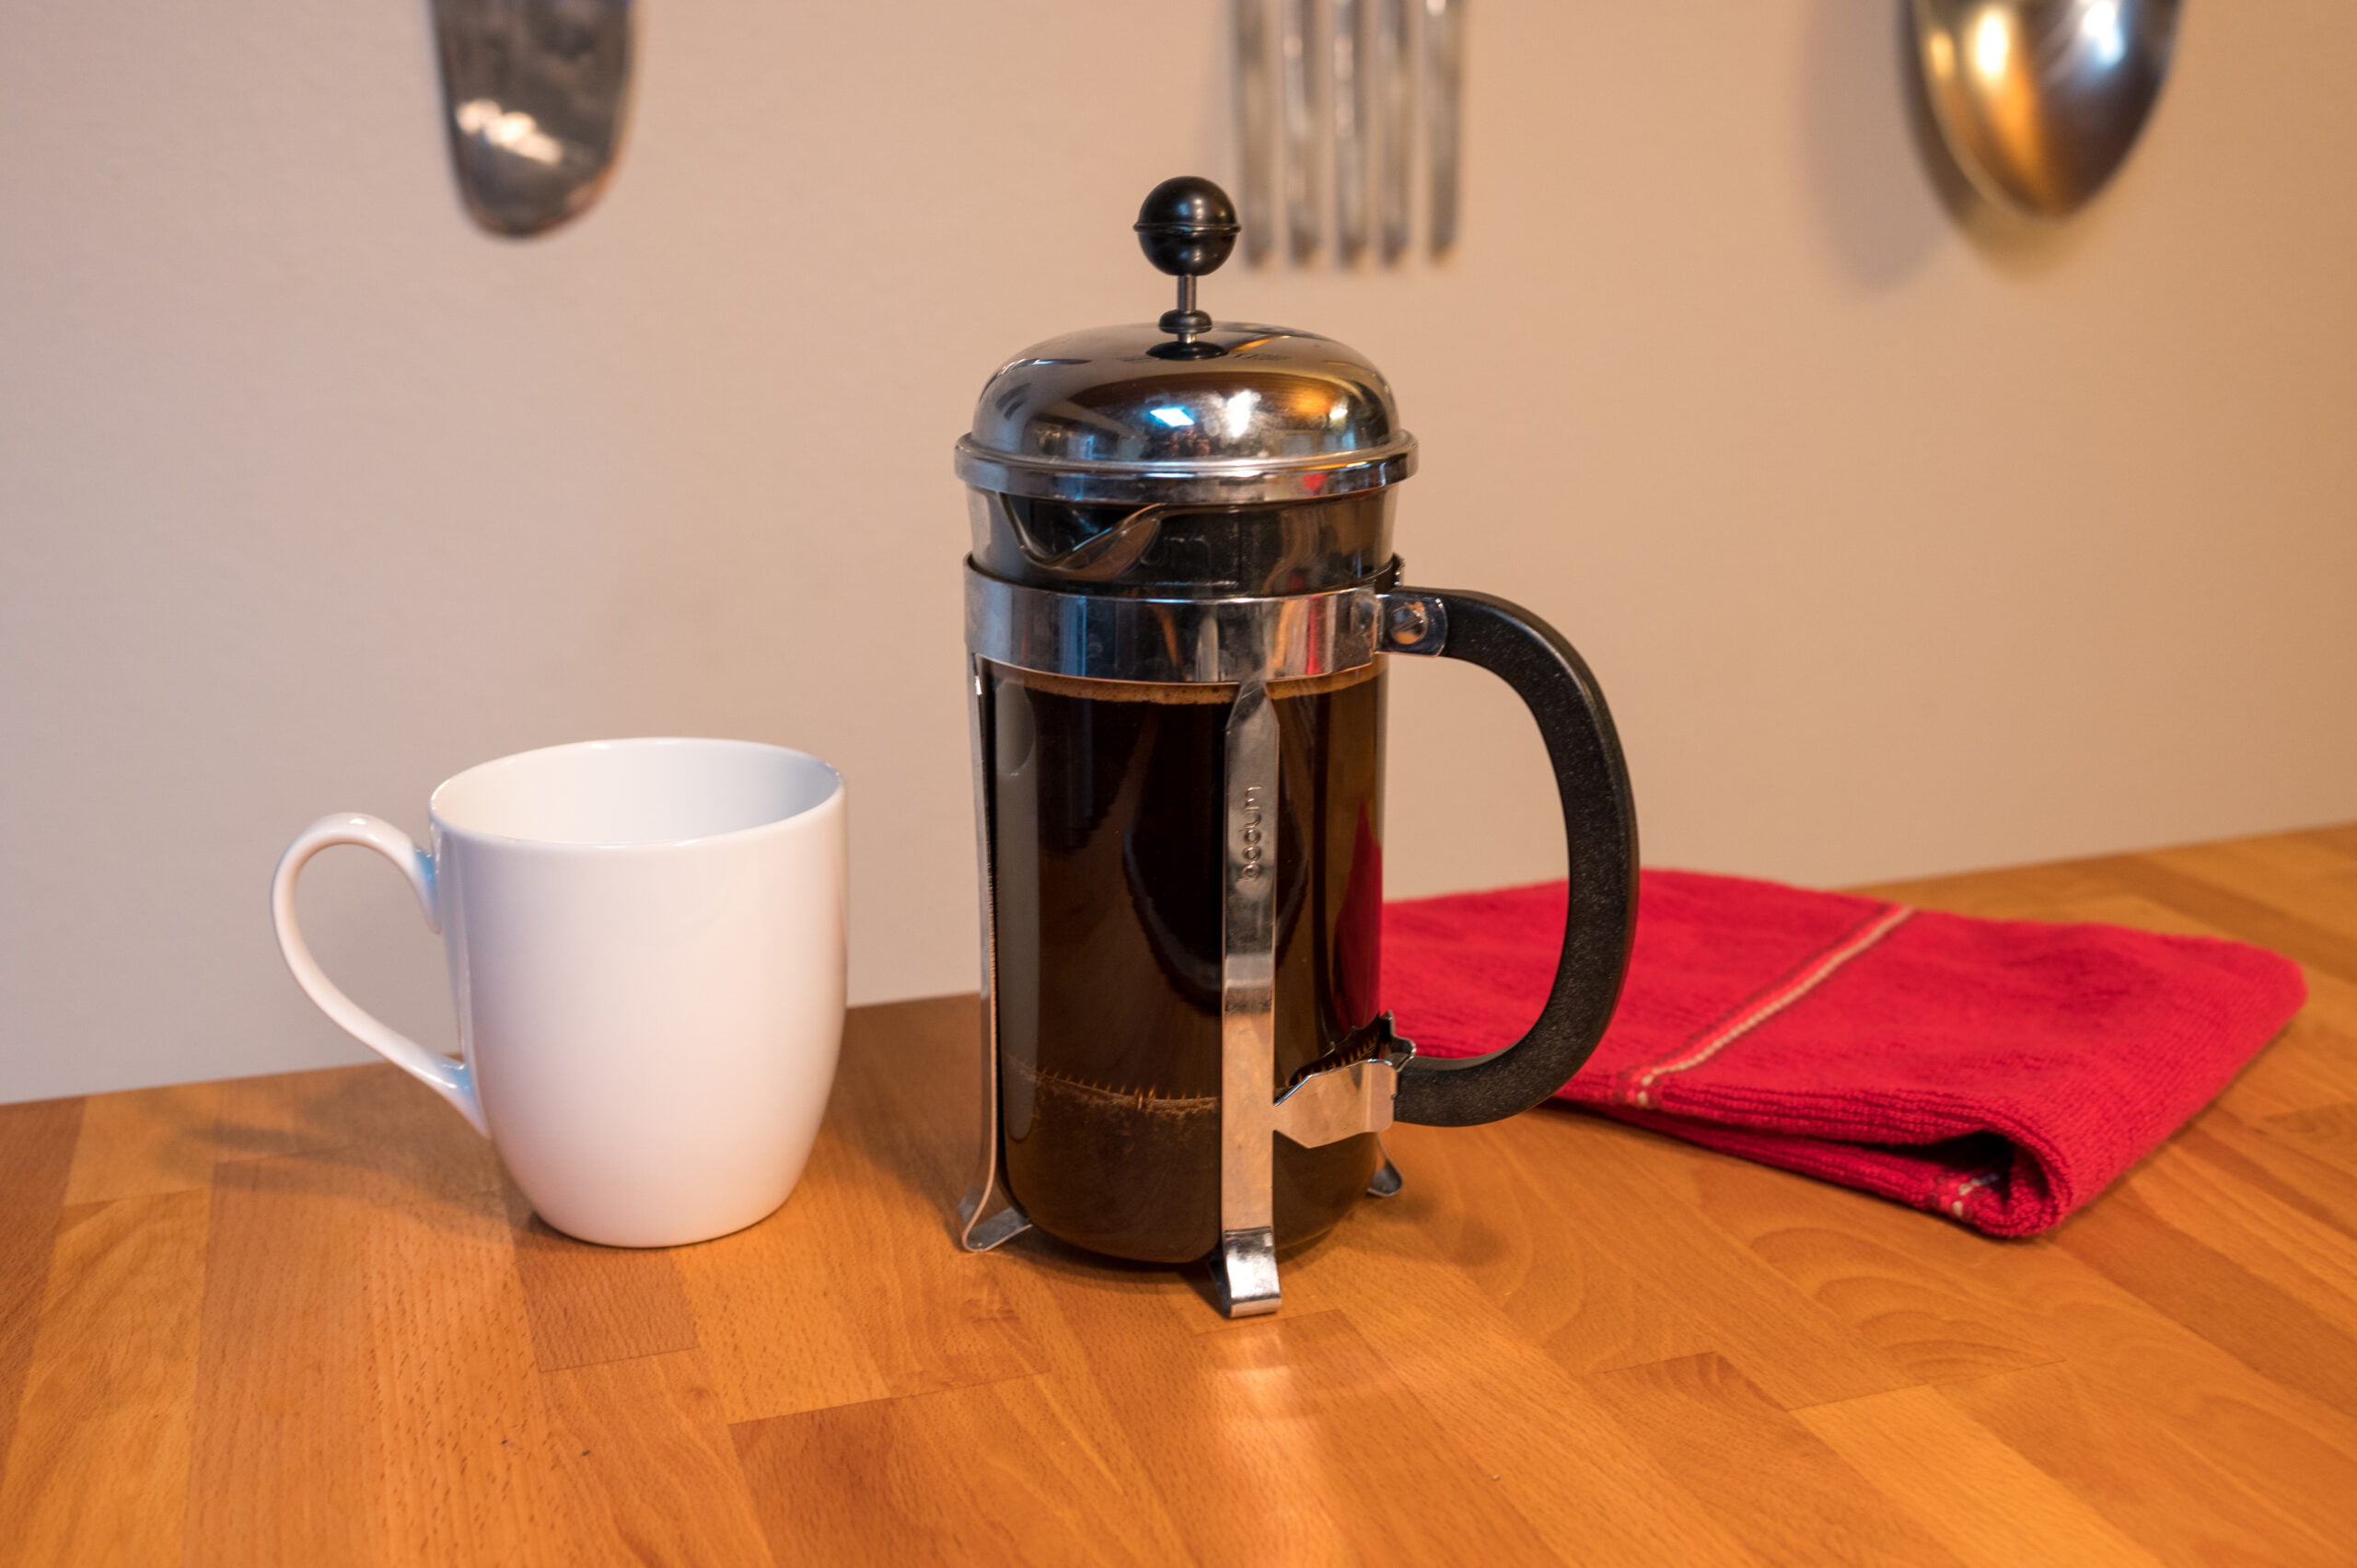
How to Easily Make French Press Coffee
French Press coffee is simple to make and yet brewing the perfect cup is all in the details. Learn how to do it with this classic method.
Read MoreRecent Posts


Keep Reading
You Might Also Like
- Coffee
10 Best K-Cup Coffees To Start Your Day
Here are 10 of the best K-Cup coffees to try. These are flavorful, aromatic, and the perfect way to start your day when you're short on time.
Read more - Coffee
7 Best Coffees to Try For Any Brewing Method
These are the best coffees to try no matter what coffee brewing method you use. They are fresh roasted and a perfect way to start your day!
Read more - Coffee
Altruistic Joe: Coffee With a Cause
Veteran-owned Altruistic Joe delivers fantastic coffee with a cause right to your door, delicious aroma and all! Buy it today and give back!
Read more