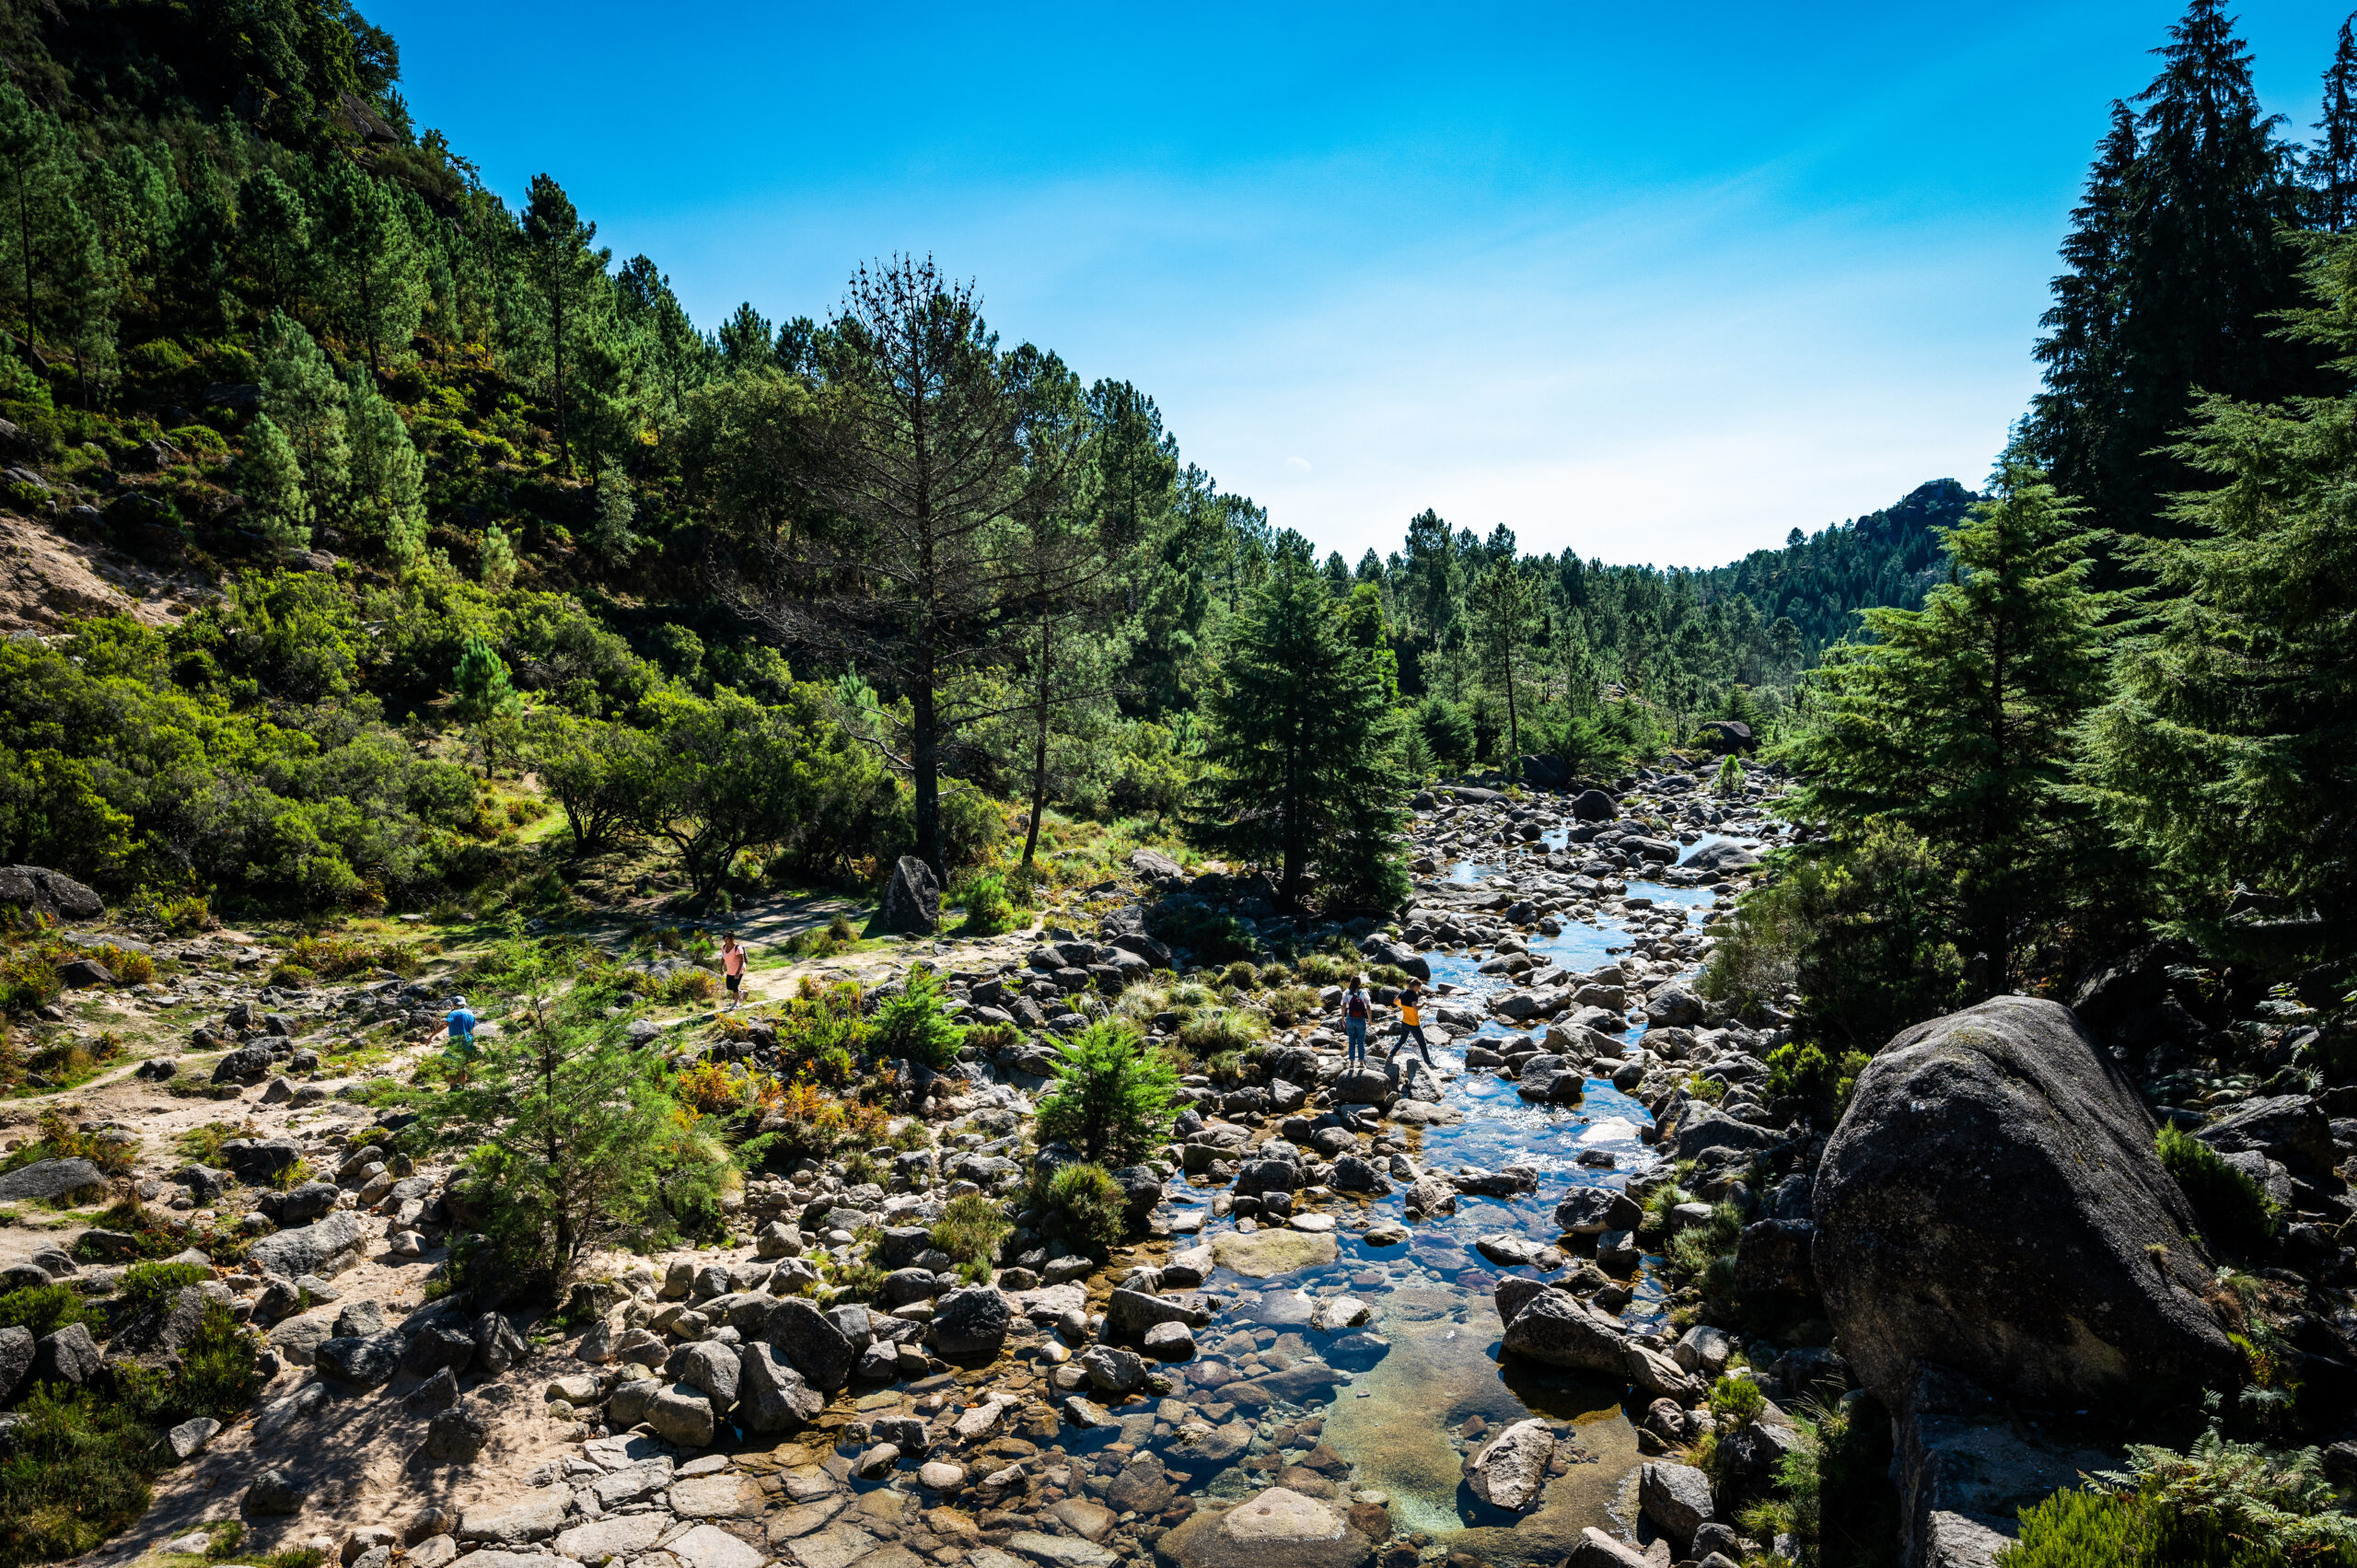
I love waterfalls! I’m not sure what it is about water cascading down rocks and over cliffs, but I can’t seem to get enough of it! Thankfully, here in the Pacific Northwest, we have no shortage of waterfalls. Snoqualmie Falls and Franklin Falls are a couple of my favorites, just a short drive from Seattle. I especially love hiking to see waterfalls. The waterfalls are my reward at the end of the trail. You know, sort of like the pot of gold at the end of the rainbow, but without the actual gold. And speaking of rainbows, waterfalls are great places to see those too! As a photographer, I enjoy capturing a waterfall’s beauty to share with others who might not get a chance to see it in person, or better yet, to inspire others to see it themselves! Waterfall photography is a skill I am still learning, but I wanted to pass along some tips I found especially useful when just beginning. Use the tips in this post as a foundation for developing your skills, and most of all, have fun!
What Kind of Camera Do You Need
You can use any camera to photograph waterfalls. However, if your camera doesn’t allow you to adjust your settings manually, you will be limited in the type of photograph you can get. So in this post, I’m going to assume you have a DSLR camera, mirrorless camera, or some type of digital camera that allows you to manually change your ISO setting, aperture, and shutter speed. I know some smartphones allow you to adjust some of these settings, so even if all you have is a smartphone or point-and-shoot camera, you can still apply many of these tips using the camera you currently own. I think getting out and using what you have now is better than not getting out at all.
What Kind of Lens Should You Use
I recommend you start with a wide-angle lens. I like to use my 24mm to 70mm zoom lens as it allows me a little flexibility on zooming in and cropping areas of my scene to achieve a different look. If you have fixed lenses, then bring a wide-angle lens and also a telephoto lens and use both to see what you can capture with each. While it may seem like you should always try to photograph the entire waterfall, often you will find by zooming in or using a telephoto lens you can highlight one unique area of the waterfall that might be overlooked with a wide-angle shot. Remember, you should have fun when you’re out photographing the world. Develop your eye, learn new techniques, but always have fun while doing it.
Additional Gear to Bring
Other gear you might want to bring would be a backpack for your camera and additional lenses, plus any snacks or water you might want. Another item that can be useful depending on the temperature you’re shooting in is a pair of gloves. Preferably ones that allow you to touch your smart phone or camera screen without removing them. I’ll also go over other gear you’ll want, such as filters, lens cloth, and waterproof clothing in the tips below.
12 Tips for Photographing Waterfalls
#1 Bring a Sturdy Tripod
A good tripod is necessary for photographing waterfalls, especially if you want to try to blur the water’s movement, rather than stop it. When using a tripod, you can slow your shutter speed down and capture the silky motion of the cascading water. One other tip regarding the use of a tripod is to be mindful of where you place it. If you put it in a stream or at the edge of the waterfall’s flow, the vibrations from the water flowing around your tripod’s legs can cause blurry images. So keep that in mind when choosing where to set up your shot.
#2 Wear Water-Resistant Clothing
You will get wet while photographing waterfalls, so make sure to wear clothing that is water-resistant or waterproof. A good rain jacket and waterproof shoes will go along way in keeping you comfortable while photographing waterfalls.
#3 Pack a Lens Cloth
This one is also essential to remember to bring. Often, you will be close to the waterfalls you are photographing, and a lens cloth will be a lifesaver! Trust me, when your lens is covered in spray from the waterfall, it makes it hard to take that photo! You don’t want to scratch your lens either by using your shirt, so it’s nice to have a lens cloth tucked in your pocket so you can easily pull it out whenever you need to wipe your lens off.
#4 Set Your ISO to the Lowest Setting
To capture the flow of water and not have the highlights in the water completely blown out, you need to set your ISO at the lowest setting on your camera. This will probably be around ISO 100, depending on your camera’s settings. You may even want to underdevelop your photos a little and then correct the exposure in post-processing to get the best results. Where you might want a higher ISO is if you’re working in low lighting conditions, and you’re trying to freeze the water’s motion. Then you might want to use ISO 200 or ISO 400.
#5 Set Your Aperture to Capture the Details
In addition to setting your ISO to the lowest setting, you’ll also want a smaller aperture (also known as an f-stop). The aperture controls the amount of light reaching your camera’s sensor. A small aperture allows less light in but will enable you to capture more of the detail of your waterfall and surrounding scenery. Whereas, the opposite is true when using a wide aperture. A wide aperture allows more light in but has less of the scene in focus. The higher the f-stop number (f/22), the smaller the opening and the least amount of light reaching the sensor. The lower the aperture or f-stop (f/2.8), the larger the opening and the more light entering your camera’s sensor. I suggest playing around with f-stops starting at f/11 through f/22 (or up to the highest f-stop your camera allows). Sometimes you may want to have a wider aperture like an f/5.6 depending on what part of the scene you want in focus(or out of focus) or if you need to allow more light in to freeze the water’s motion. Other times, to achieve a longer exposure time (slow shutter speed), you’ll need a smaller aperture to let in less light. The more you experiment with your camera’s settings, the more you’ll learn and improve your photography skills.
#6 Setting Your Shutter Speed
You can adjust the shutter speed to create different effects when photographing waterfalls. You can freeze the motion of the water with higher shutter speeds, or you can slow it down and create a blurred, silky movement with longer exposure times. I recommend trying different shutter speeds to see which effect you prefer. There is no perfect shutter speed or aperture; it all depends on the look you want. Experiment with your settings to see which effect you like the best. If, for example, you want to try freezing the motion of the water than start at a shutter speed of 1/200, this will partially freeze the movement, then try 1/500 to freeze the water’s action completely. You may need to use a larger aperture and increase your ISO to achieve this depending on the light in which you’re shooting.
#7 Bring the Right Filters
Two types of filters are handy to have when photographing waterfalls, polarizing filters, and a neutral density (ND) filter. The polarizing filter is useful when you’ve got a pool of water below your waterfall, and you want to capture what’s beneath the surface. The polarizing filter will reduce the glare and reflections on the water’s surface. ND filters reduce the amount of light coming into the camera’s sensor. They make your camera think it’s darker than it is. You can purchase them in varying strengths depending on how much light you want to block. Although not a requirement for photographing waterfalls, they help you achieve the lower shutter speeds you need to capture the motion of the waterfall without blowing out the highlights. If you think you’ll photograph waterfalls regularly, then consider purchasing one. All of the images I’ve shown in this article were shot without an ND filter. However, I also shot early in the morning, in a wooded landscape shaded from the sun. This is a good set to get started with, however if you’re looking for something a little less expensive you can always buy one to start with and then add on from there. Make sure you purchase the correct filter size to match your lens size. You would not be able to achieve the low shutter speeds and retain the details in the waterfall if this were a bright sunny scene. The highlights will be completely blown out. ND filters are necessary when shooting waterfalls on a bright sunny day if you wish to slow the water’s motion.
#8 Get a Shutter Release Cord
Another helpful tool is a remote shutter release cord. They are useful when working with very low shutter speeds, as any amount of movement can blur your image. So by using a shutter release cord, you reduce the risk of camera shake when pressing down the shutter release button. This is the one I use with my Nikon and ask you can see they’re relatively inexpensive. All of the images in this post were taken without a shutter release cord. So, you can certainly photograph waterfalls without them, but they are convenient to have and not all that expensive either. Plus, if you have any interest in astrophotography or night photography, you’ll definitely want one!
#9 Try Different Angles & Viewpoints
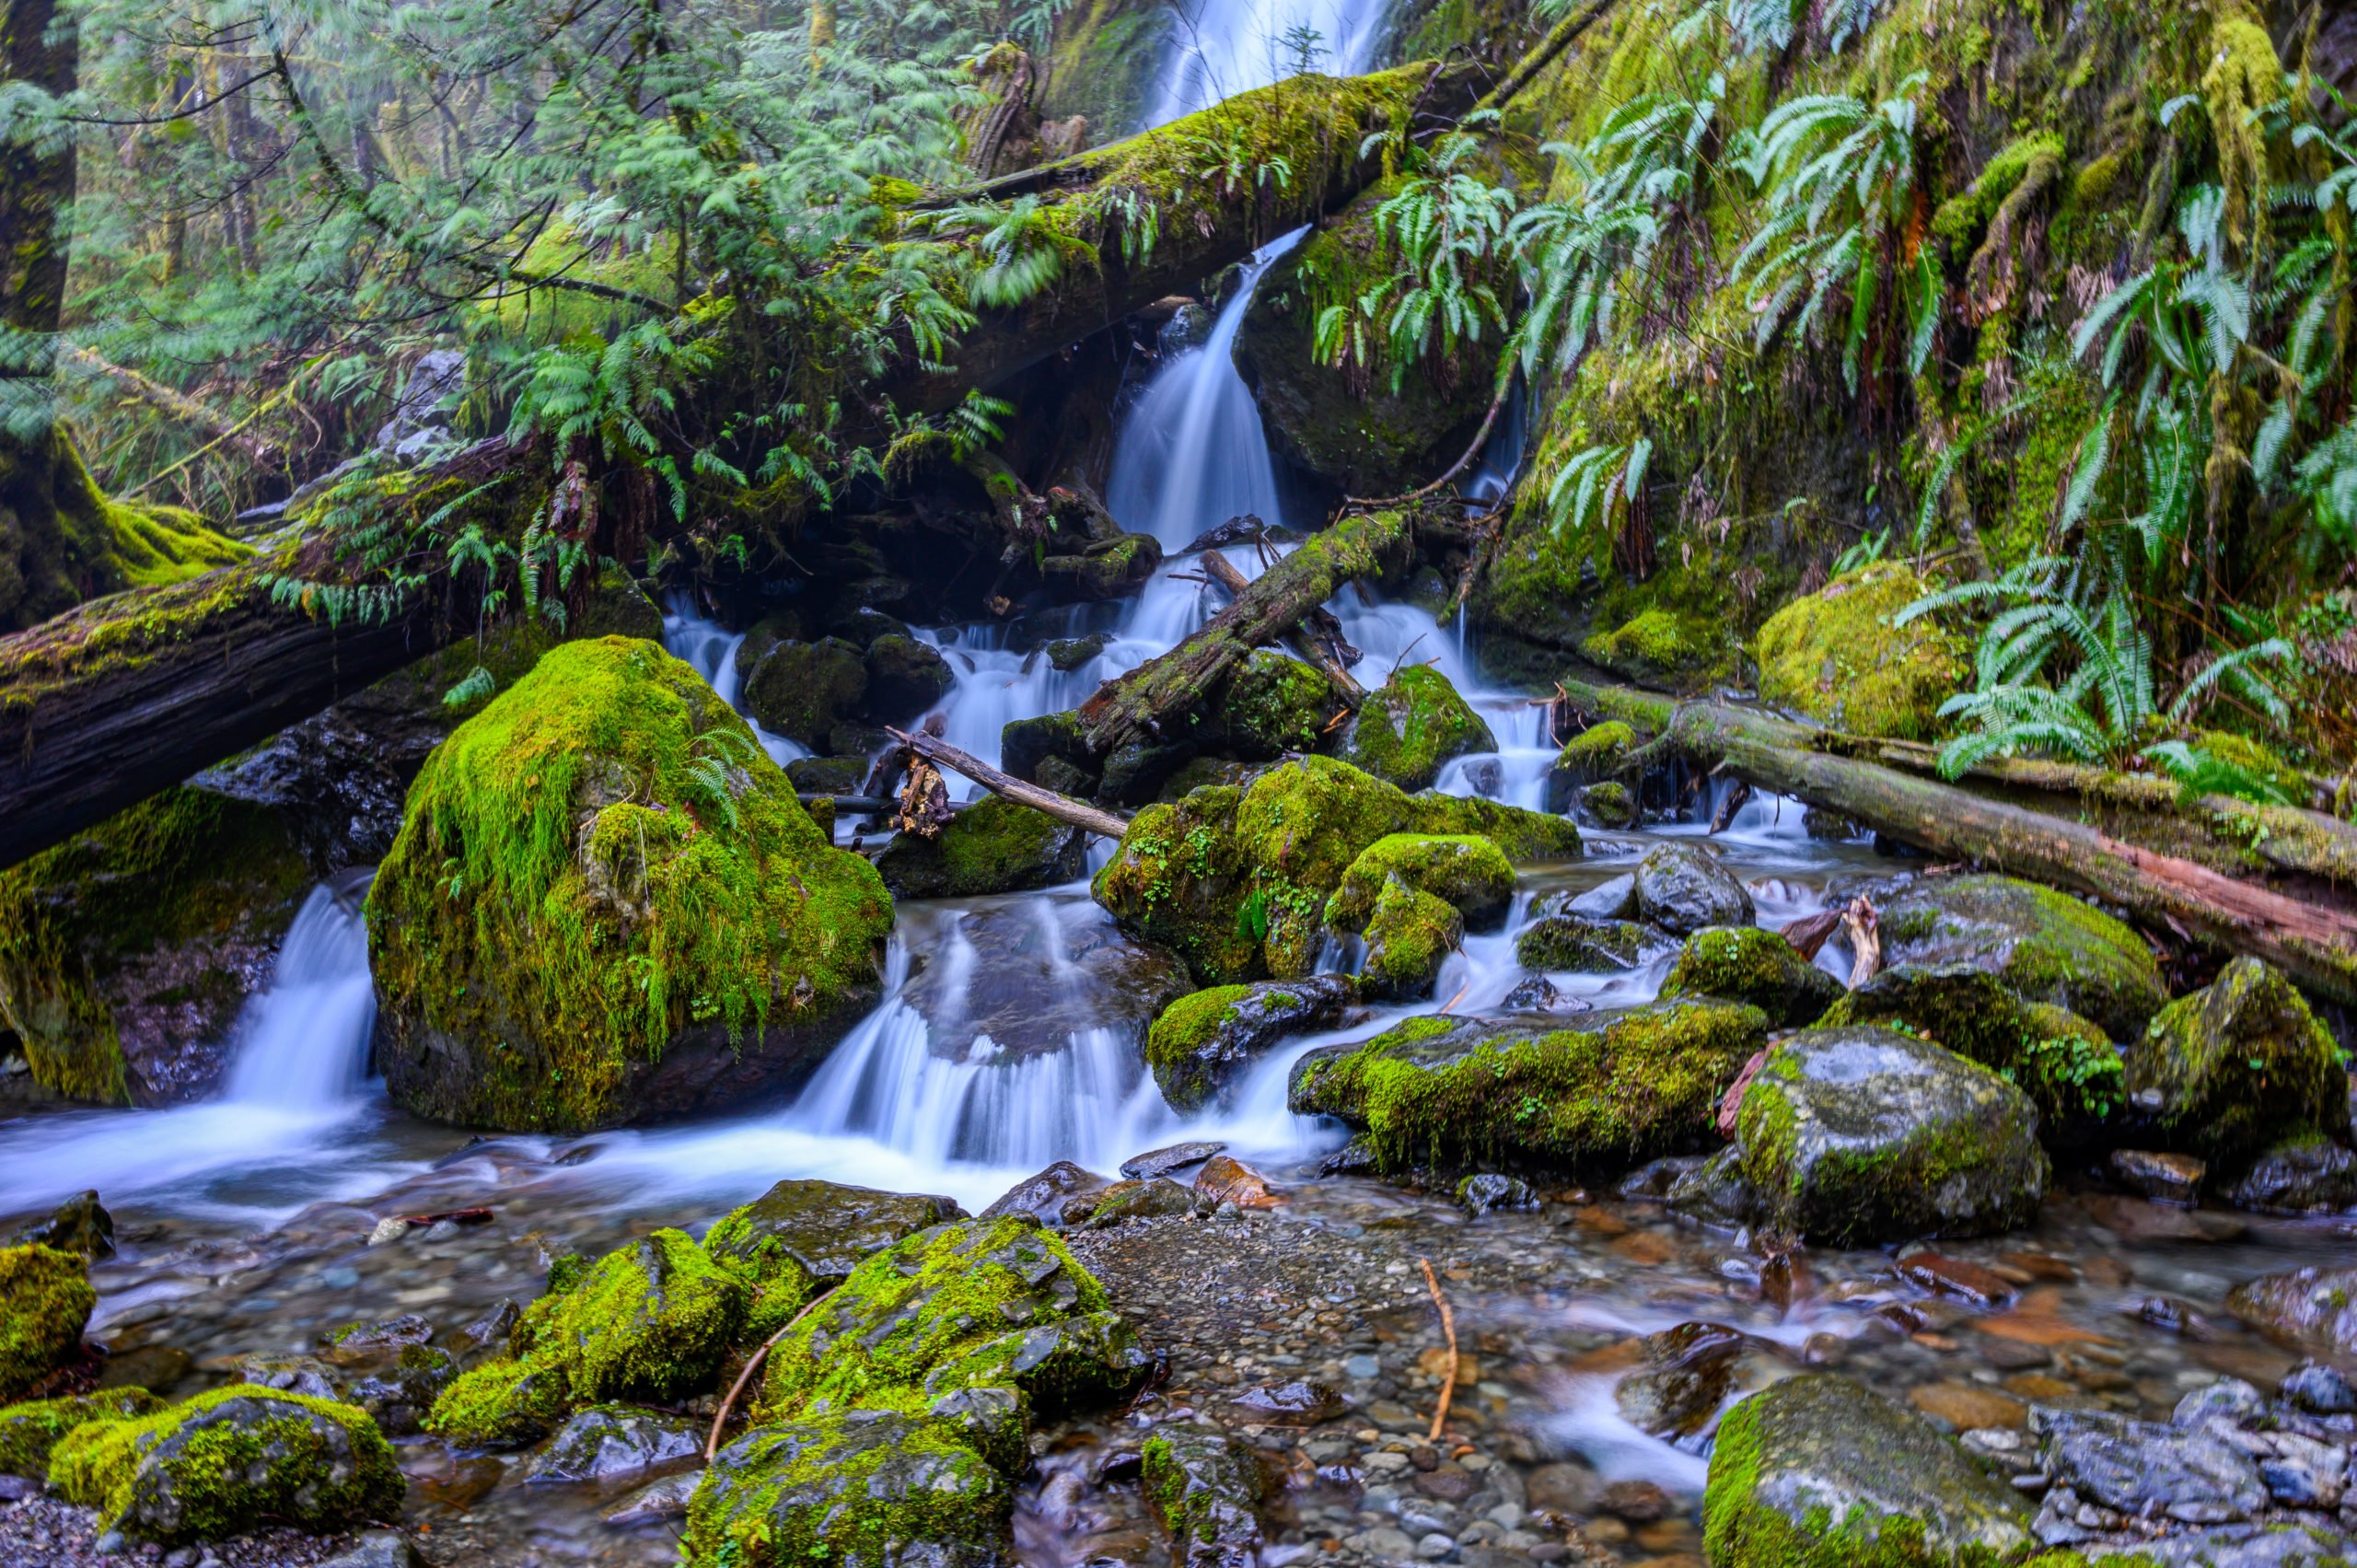
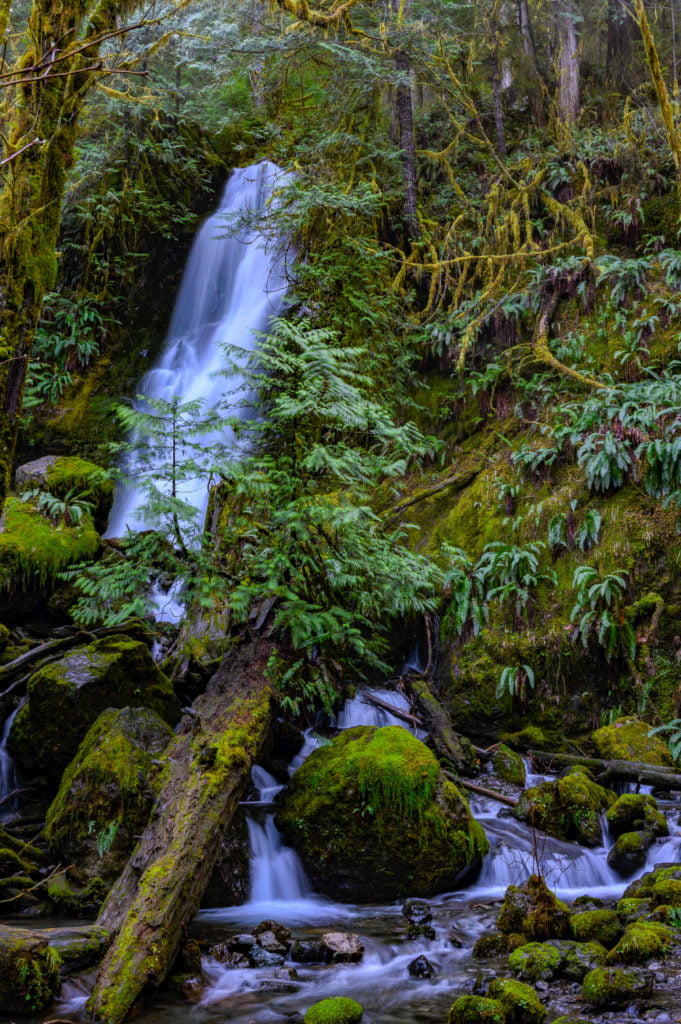
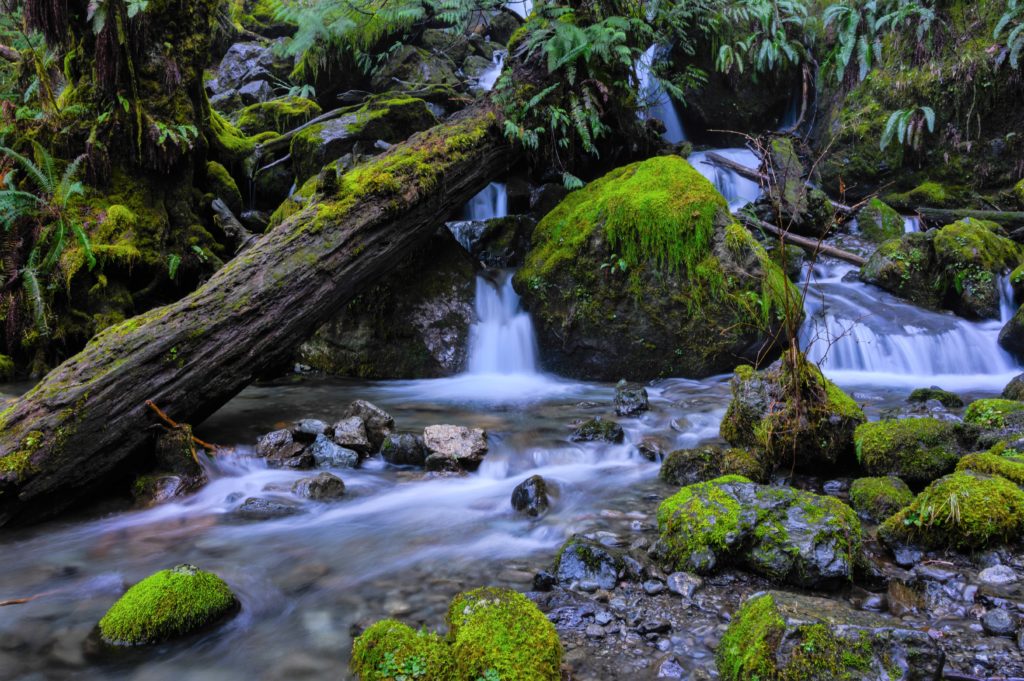
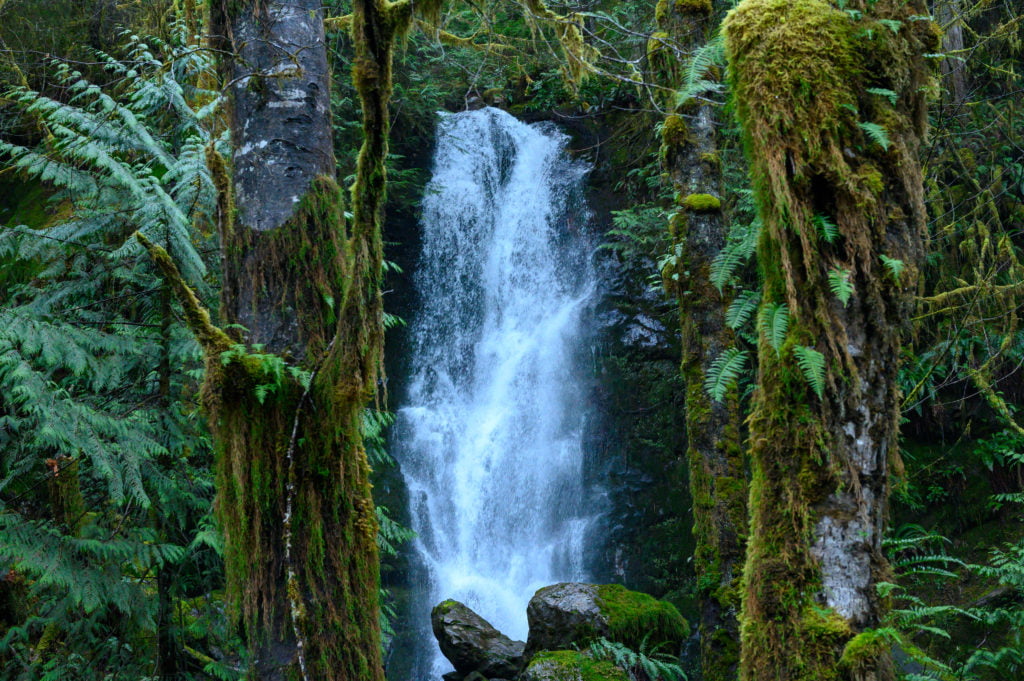
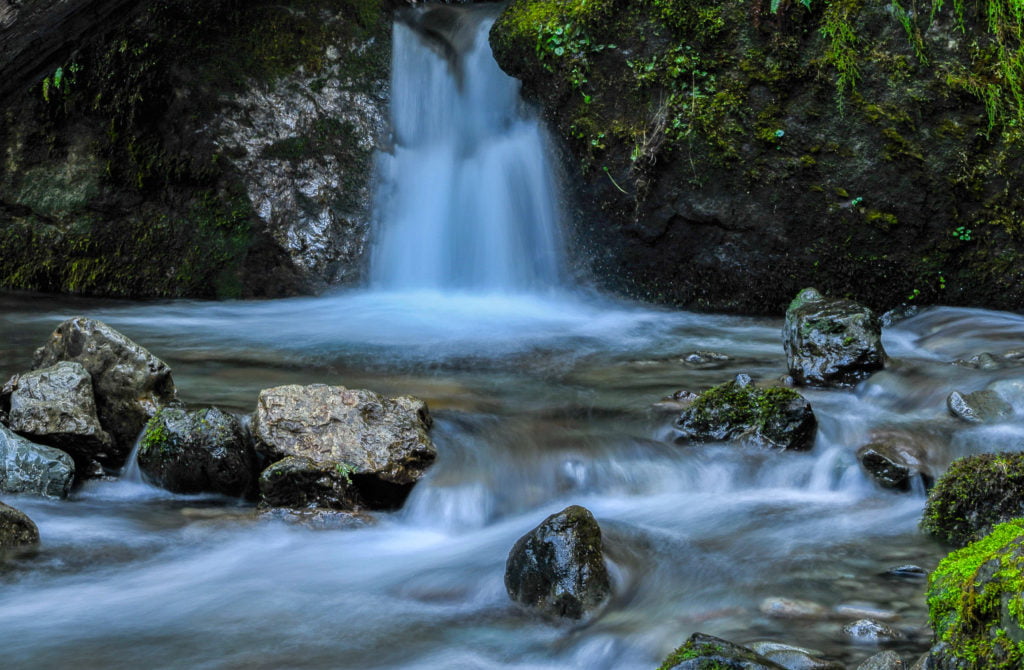
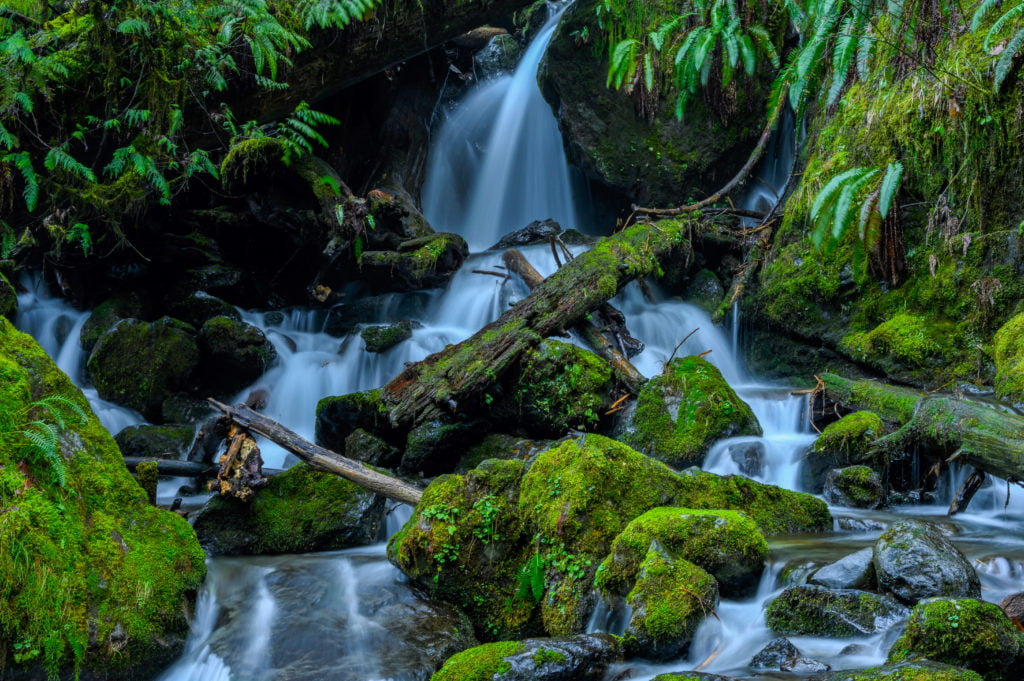
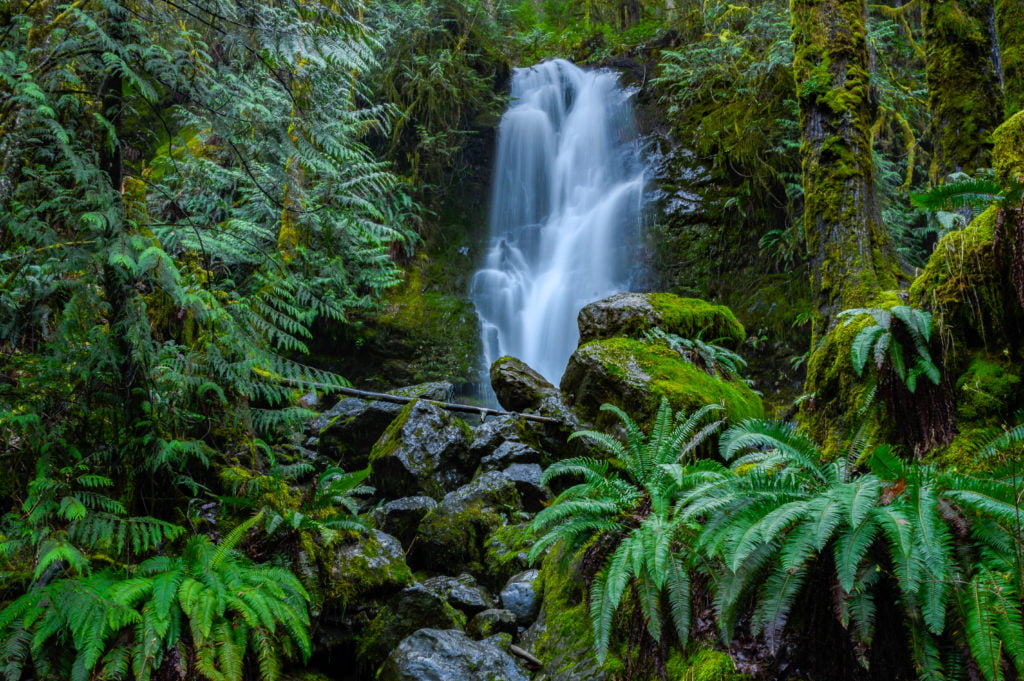
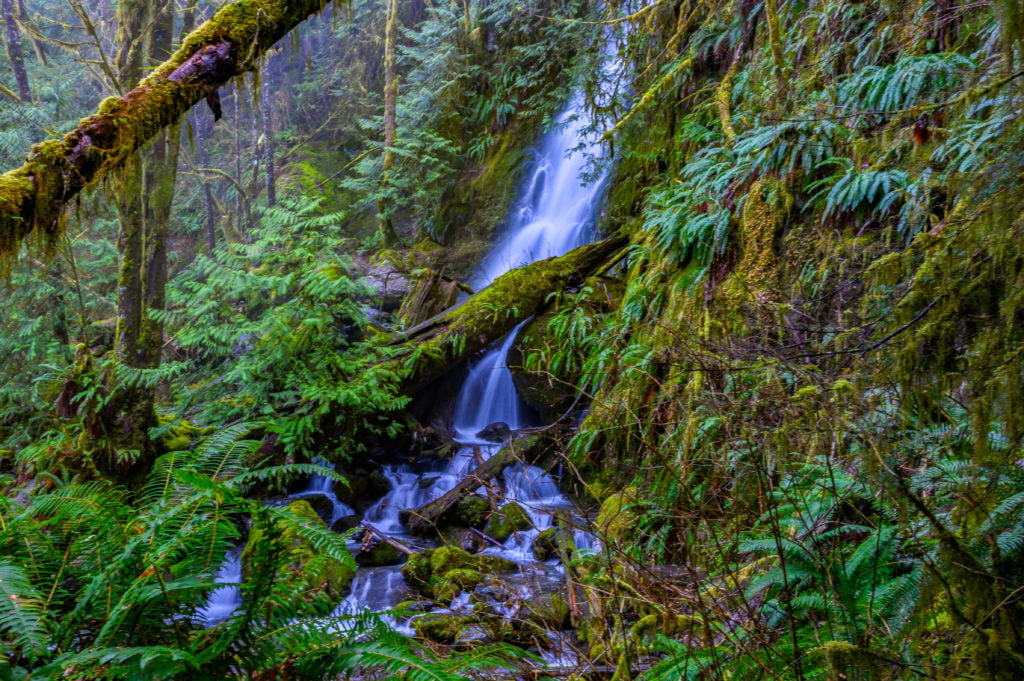
Play around with the various angles at which you can photograph your waterfall. All of the photographs in this article were taken at the same waterfall setting. At the beginning of the post, I included a photo of the overall scene I was working with. I did this so you could see examples of shooting a single scene from many different angles and viewpoints. Try shooting down low, or finding a higher vantage point. Perhaps, swap out your wide-angle lens for a telephoto lens and try focusing on just one area rather than trying to capture the entire waterfall. No matter what you’re photographing, it is always good to try to see it from different angles and viewpoints. Many times people will just walk up, center their subject, snap, walk away. However, if they took the time to compose their photo, choosing to highlight unique features in their scene, they would most likely create a more visually appealing photograph. Take time to get low to the ground, or to climb that small hill close by, and discover a new way of viewing your subject. If you have a zoom lens, make sure to move it in and out to see what look you prefer. You might be surprised at what a difference cropping the scene in can make.
#10 Be Careful of the Slippery Conditions
This one should go without saying, but be careful when walking around a waterfall. Slippery when wet, is a condition that always applies to waterfalls. So while I recommend that you try to photograph all the available angles, only do so when it is safe. You don’t want to injure yourself or break your camera—now that would be bad!
#11 Shoot in RAW Mode
If possible, shoot in RAW mode as this enables you to capture the most detail in the highlights and shadows. This is important for post-processing as you can bring out those details later when you begin to “develop” your photo and correct any low-lighting and underdevelopment. If your camera does not allow you to shoot in RAW, then just choose the highest JPEG setting it allows. Often cameras will have JPEG-Fine or JPEG-Normal, if that is the case with yours, choose JPEG-Fine or the highest quality available when RAW isn’t an option.
#12 Experiment & Take Notes
Use bracketing on your camera to take multiple photos at different exposures. Try different combinations of aperture and shutter speed to achieve the effect you desire. Consider bringing a small pocket notebook with you and a pen to take notes about what settings you’re trying, what you’re learning, and maybe any ideas that come to you for future photoshoots. Yes, modern cameras now record all your settings for you, but sometimes it’s nice to write it down for easy viewing in the field.
Final Notes on Photographing Waterfalls
Best Weather for Photographing Waterfalls
Often when photographing outdoors, we prefer sunny conditions, but when it comes to waterfalls, a cloudy day can often be a bonus! You see, if it is a little darker out, it helps achieve the lower lighting conditions needed to fully capture the details of the waterfall. A calm day is also essential when photographing waterfalls. This helps keep your camera from shaking and limits the risk of blurred, out of focus images. If you have a long exposure and it’s windy, then the trees and shrubs and water in the scene will be blowing and end up blurred due to the slow shutter speeds.
No Perfect Setting
Remember, there’s no “right” shutter speed or aperture. However, some settings you can start with to freeze the water are a shutter speed of 1/200 and higher and then a wider aperture to let in more light. If you want to capture the silky motion of the waterfall, in addition to choosing the lowest ISO, try a smaller aperture, maybe f/16 and a 1-second shutter speed for a starting point. Then play around with the settings from there until you get the look you want.
Have Fun
Enjoy developing your photography skills (yes, I meant that as a pun). It is so much fun to try new things. When you look at your photographs later, it’s exciting to see what you’ve captured and to come up with ideas to try next time. Remember, all the gear in the world won’t replace a good eye and regular practice. So learn to use what you have, and most of all, have fun doing it! Go Chase Some Waterfalls! Note: Travelffeine is reader-supported. This post contains affiliate links. When you make a purchase using one of these affiliate links, we get paid a small commission at no extra cost to you. And as always, all opinions are our own. Thank you!
Written by
Charity
Traveler, coffee enthusiast, and storyteller — exploring destinations one sip at a time.
Share this story
Keep Reading
Keep Reading

More Adventures
Explore More
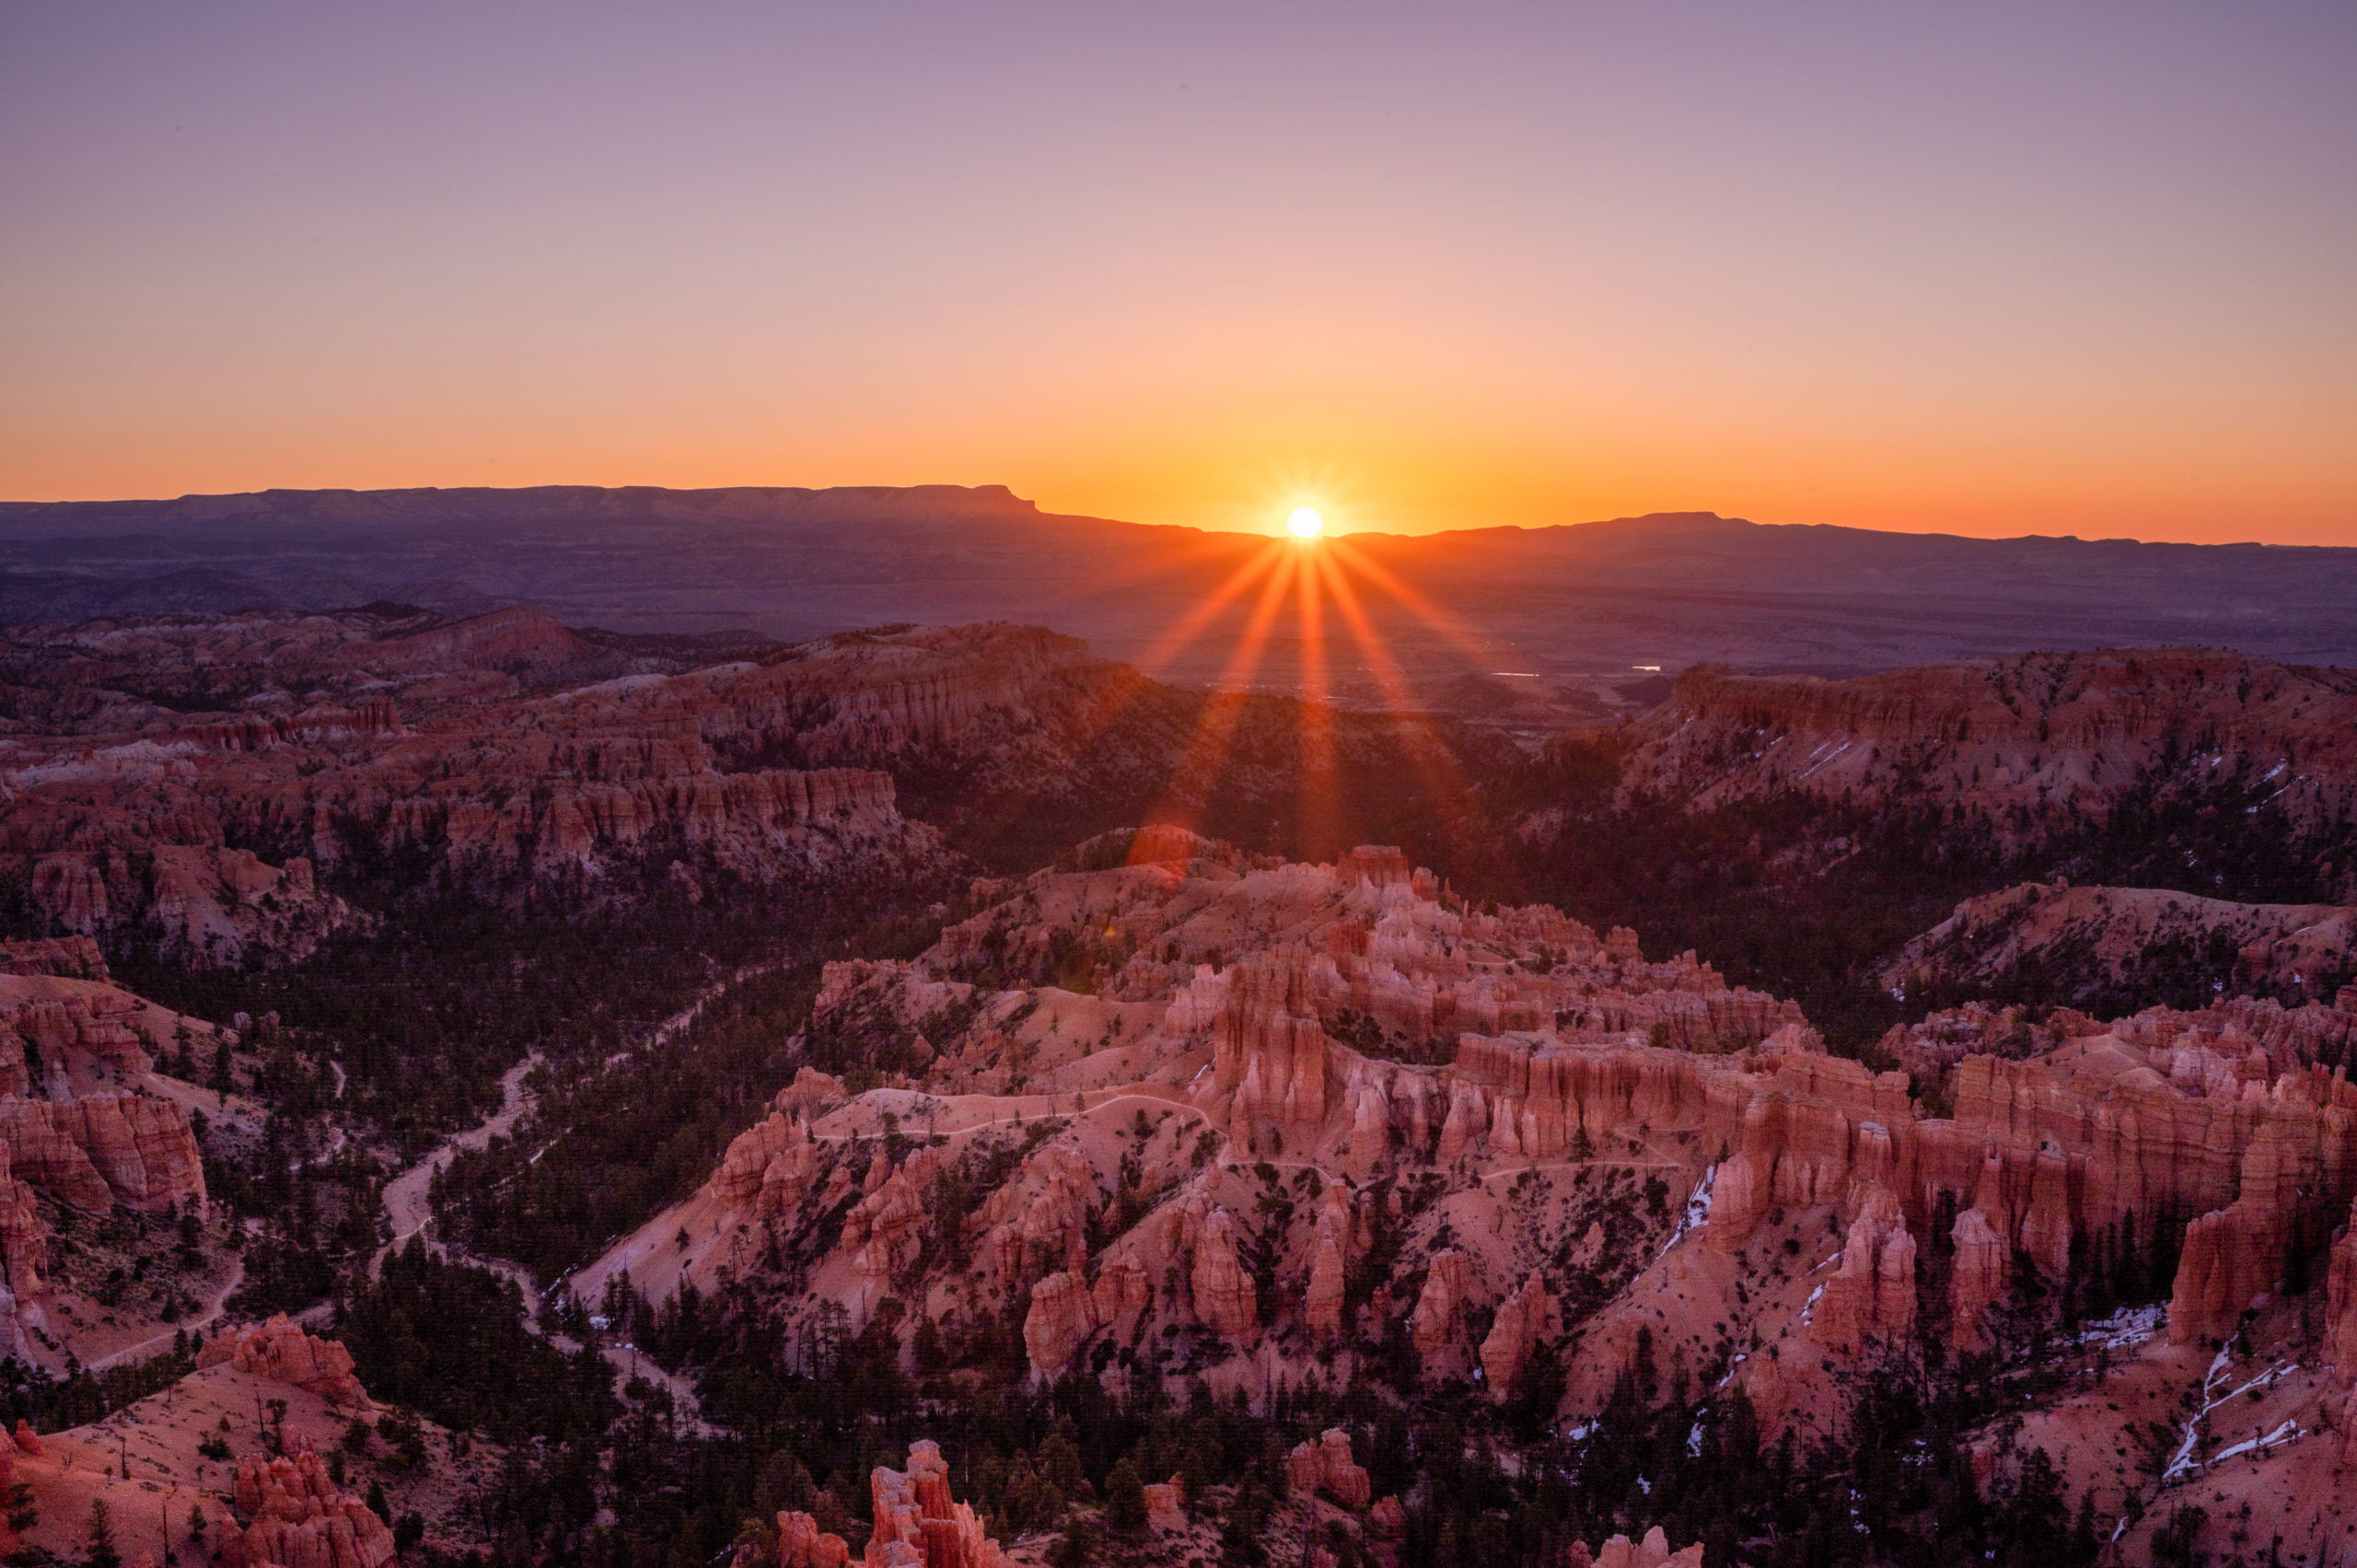
The Best Viewpoint to Watch the Sunrise at Bryce Canyon
Morning light is spectacular in Bryce Canyon. Discover where to go for the best views for watching the sunrise in Bryce Canyon National Park.
Read MoreRecent Posts
Keep Reading
You Might Also Like
- Photography
The Best Viewpoint to Watch the Sunrise at Bryce Canyon
Morning light is spectacular in Bryce Canyon. Discover where to go for the best views for watching the sunrise in Bryce Canyon National Park.
Read more  Le Cafe
Cinnamon Coffee Cake: Embracing Kaffee & Kuchen
This delicious cinnamon coffee cake with streussal topping will have you embracing the culture of kaffee und kuchen on a regular basis!
Read more Hiking
Hiking The Narrows in Spring at Zion National Park
Hiking The Narrows at Zion National Park is a unique experience you'll never forget. Learn how to plan your visit and what you'll need.
Read more